Create a Test Case
Creating test cases ensures your testing process is structured and thorough. TestCaseLab offers two methods to add test cases—quick and detailed. Follow this guide to get started.
Learn what is a Test Case here.
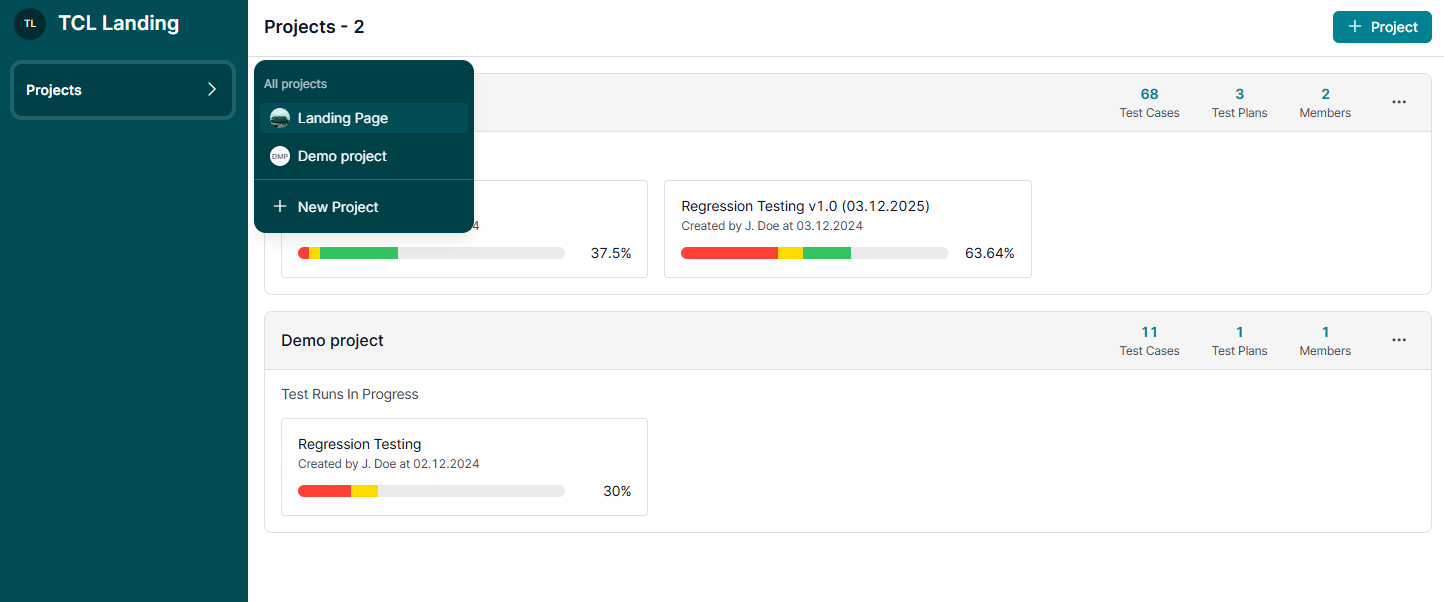
1. Go to Test Cases
- Open the project where you want to add test cases.
- Navigate to the Test Cases page from the sidebar.
2. Quick Create a Test Cases
Ideal for adding basic test cases with minimal details.
- Use the Quick Create option for fast, in-line test case creation:
- Enter the test case Title directly into the list via ‘+ Case’ button.
- Click ‘Enter’ to save the test case.
Note 1: New test cases are added to the bottom of the list within the assigned Suite.
Note 2: Test Case Details can be filled out at any time in Test Case Details via in-line edit functionality or via a comprehensive Edit Case form.
Learn more about organizing test cases with Suites here.

3. Create a Comprehensive Test Case
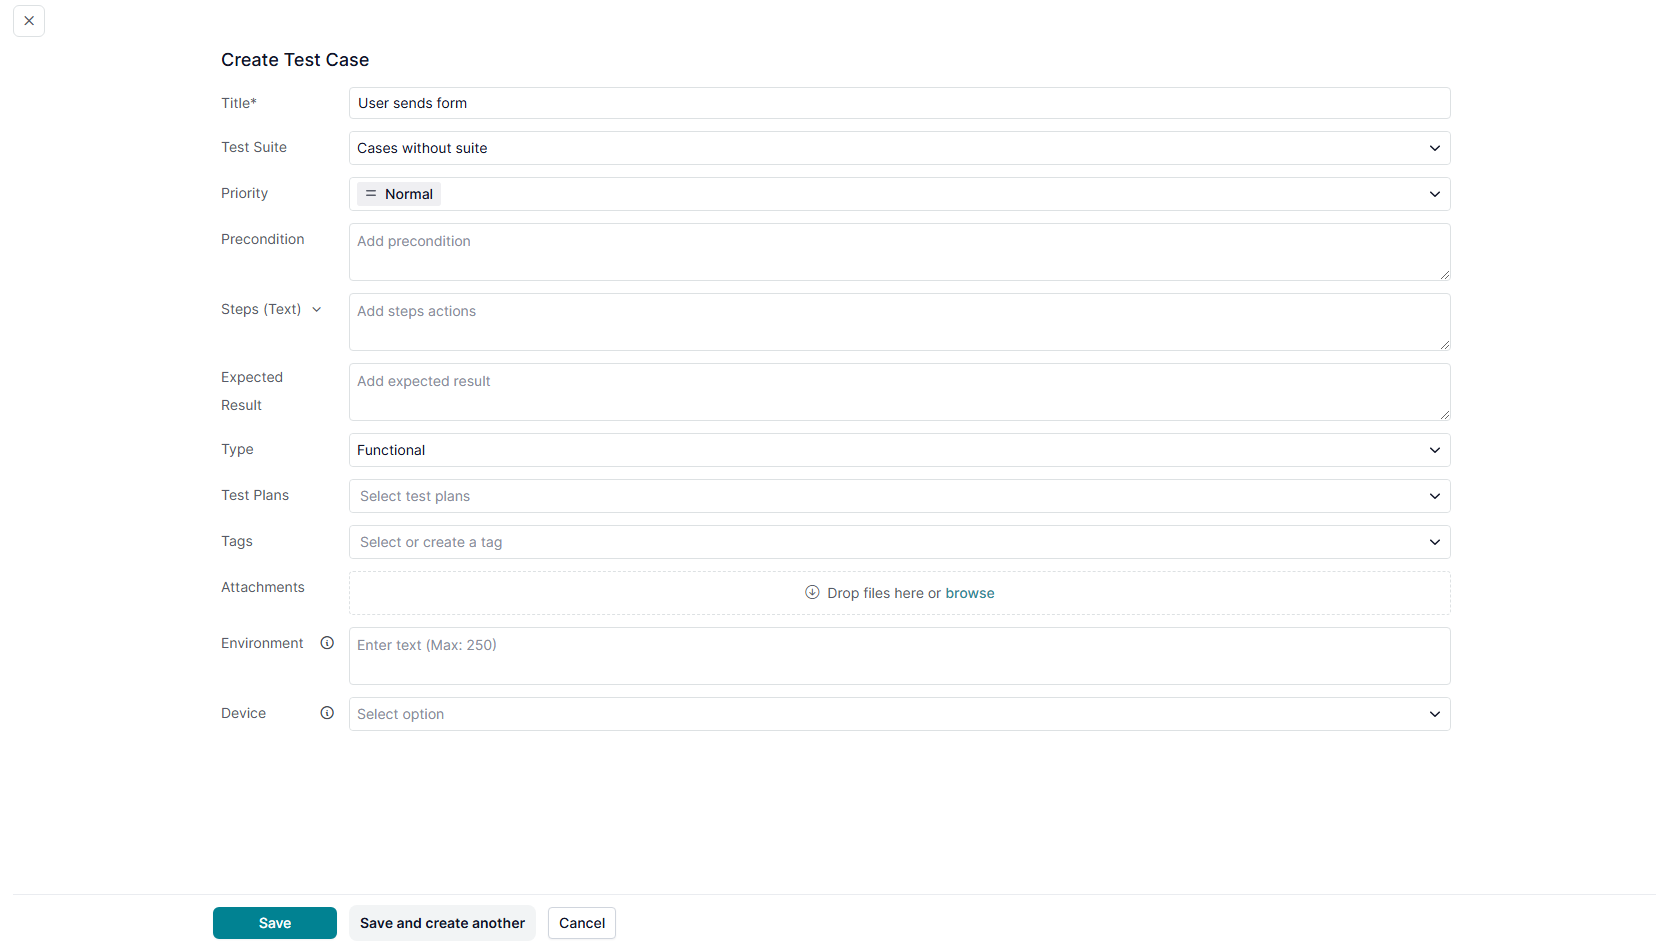
- For detailed test cases, click the ‘+ Case’ button in the header of the Test Cases page.

- This opens the Create Case Form, where you can add:
- Title: Entitle a test case.
- Suite: Assign the test case to the appropriate Suite.
- Priority: Set the importance (e.g., High, Medium, Low).
- Precondition: Define any setup or requirements needed before execution.
- Steps and Expected Result: Write detailed steps using:
- Text Mode: Enter steps as plain text.
- Step Table Mode: Add structured steps and expected outcomes.
- Attach up to 2 files per step.
- Type: Categorize the test case (customizable in Project Settings).
- Tags: Add labels to organize and filter test cases.
- Test Plans: Link test cases to relevant plans.
- Custom Fields: Include project-specific fields (customizable in Project Settings).
- Attachments: Add supporting files (up to 10 MB each).
- Use the ‘Save & Create Another’ button to save the current test case and immediately open a new form, streamlining the process for multiple entries.
Manage a Test Case
Managing your test cases in TestCaseLab helps keep your documentation organized and ensures accurate and up-to-date information. Follow this guide to edit and interact with your test cases effectively.
1. Manage Test Cases in the List
- Change Priority: Update the test case priority directly in the Test Cases List.
- Edit Title: Click on the test case title to edit it in-line.


2. Change Suite or Position
- Move to a Different Suite: Drag and drop the test case into a new Suite.
- Reorder Position: Use drag-and-drop to reorder test cases within a Suite.
Note: Drag-and-drop of the Test Cases List grouped by Suites is available only for Project Administrators to ensure consistent list ordering for the entire team.
Learn more about Suites here.

3. View and Edit Test Case Details
- Click on a test case in the list to open its Details.
- Edit the following fields in place:
- Title: update the test case title.
- Suite: Change the suite assignment.
- Priority: Update the test case priority.
- Precondition: Modify the setup or conditions needed before execution.
- Steps and Expected Results:
- Use Text Mode or Step Table Mode for editing.
- Attach up to 2 files per step (applicable in Step Table Mode).
- Type: Update the test case type (customizable in Project Settings).
- Tags: Add or update tags for organization.
- Test Plans: Associate the test case with specific test plans.
- Custom Fields: Update project-specific custom fields linked to the test case (customizable in Project Settings).
- Attachments: Add or replace supporting files.
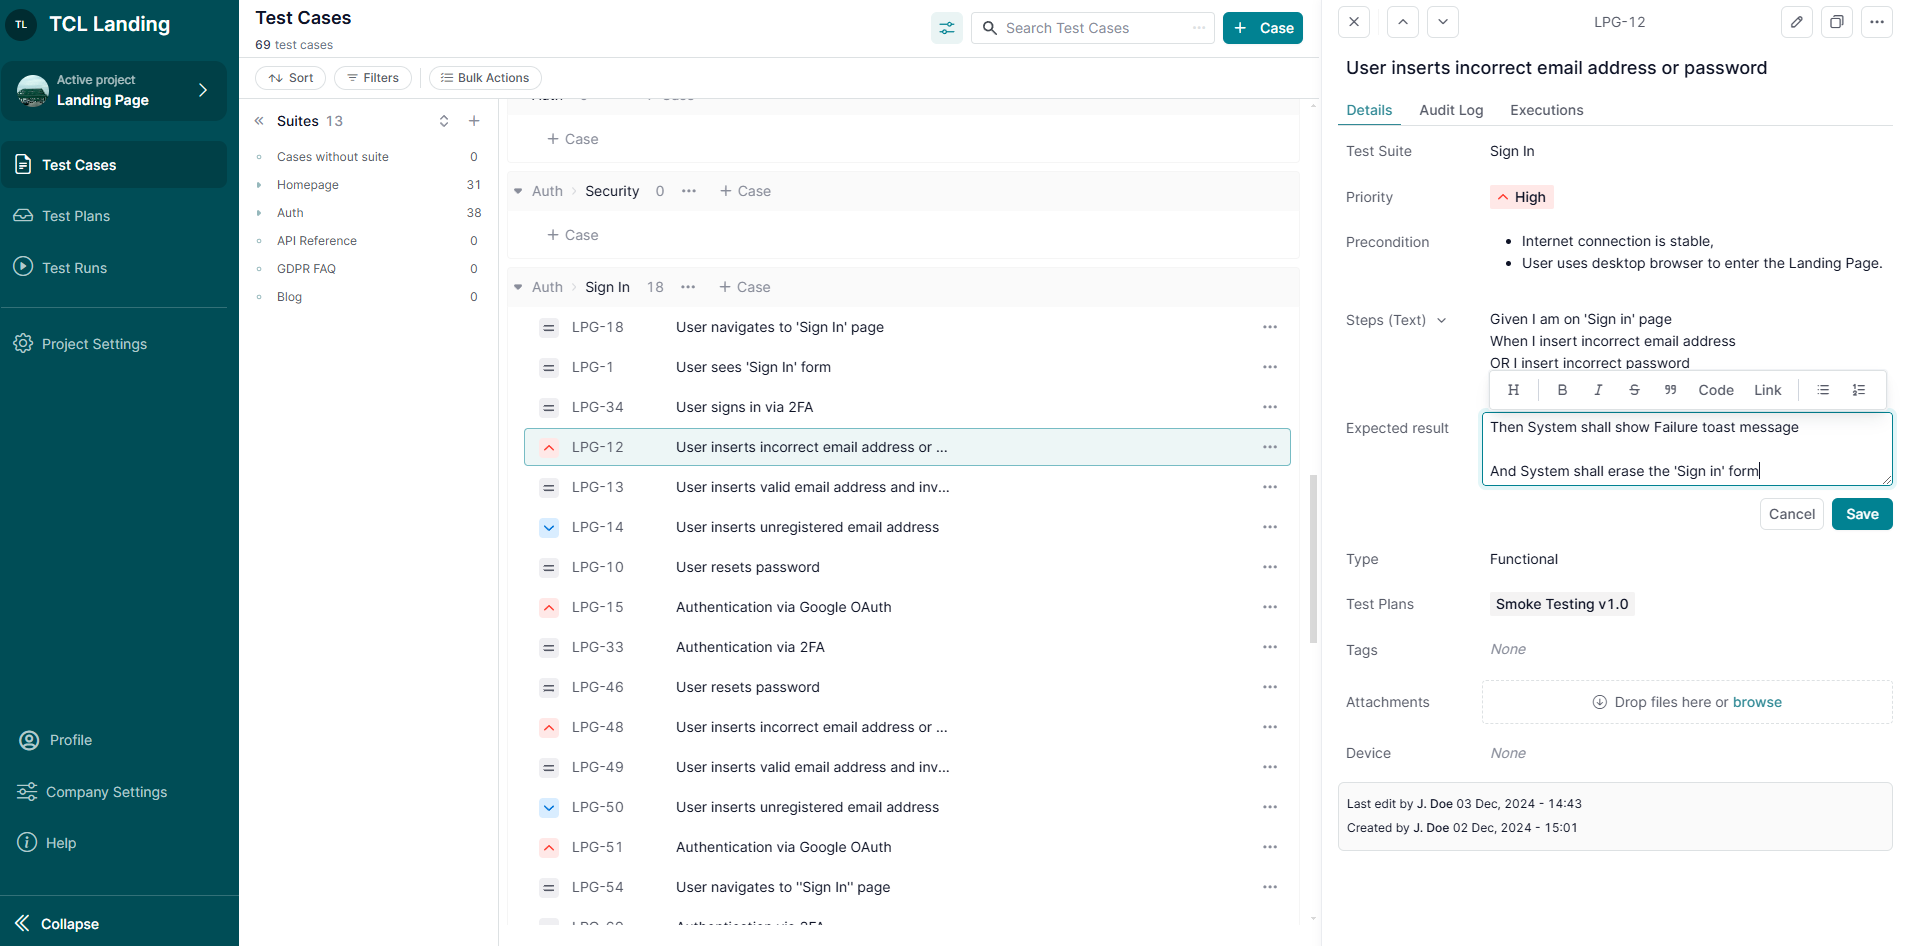
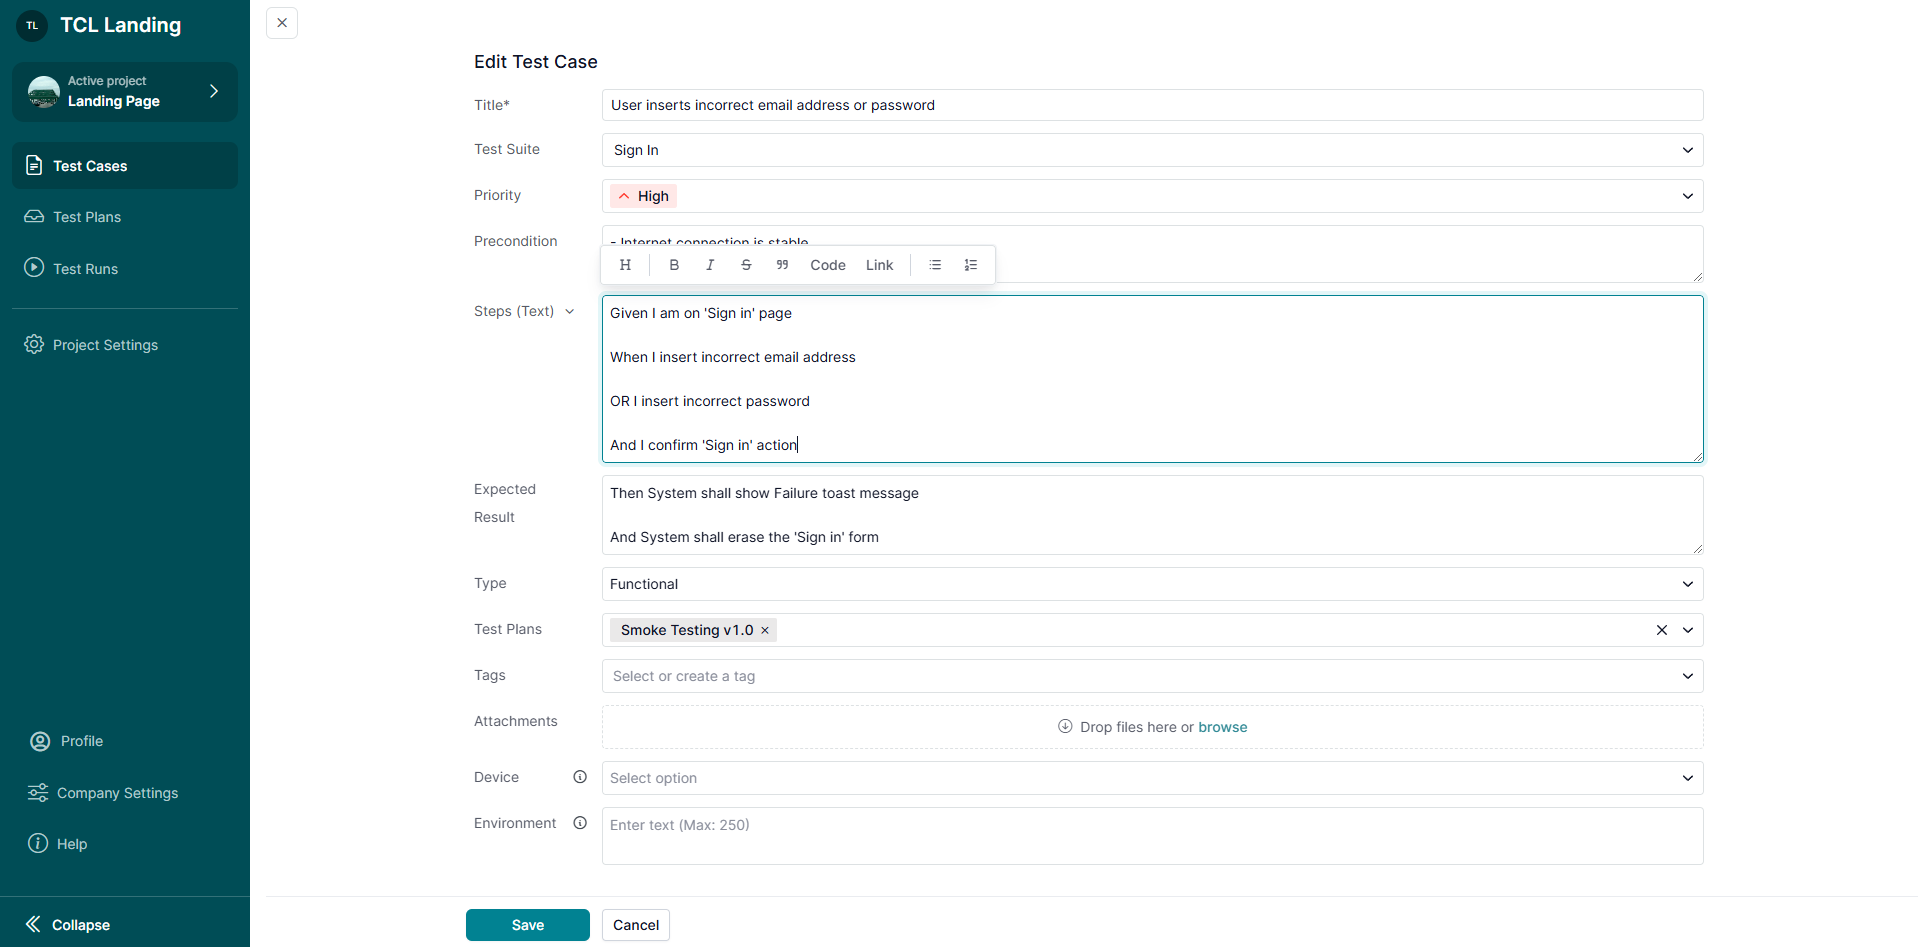
4. Use the Comprehensive Edit Case Form
Click ‘Edit’ to open the full Edit Case Form.
Note: This allows you to manage all test case details comprehensively in one place.
What’s Next?
Keeping your test cases organized and updated ensures efficient test management for your team. For more help, explore related guides or contact support. We’re here to assist!


.webp)
