TestCaseLab is a simple and comfortable test management platform for running tests and reporting bugs.
Easily integrate your favorite test case management tool with Redmine! The following list of actions is a short guide to help you get started.
1. Generate API Key
- In order to start the integration you should be logged in to the Redmine test case management tool as Admin.
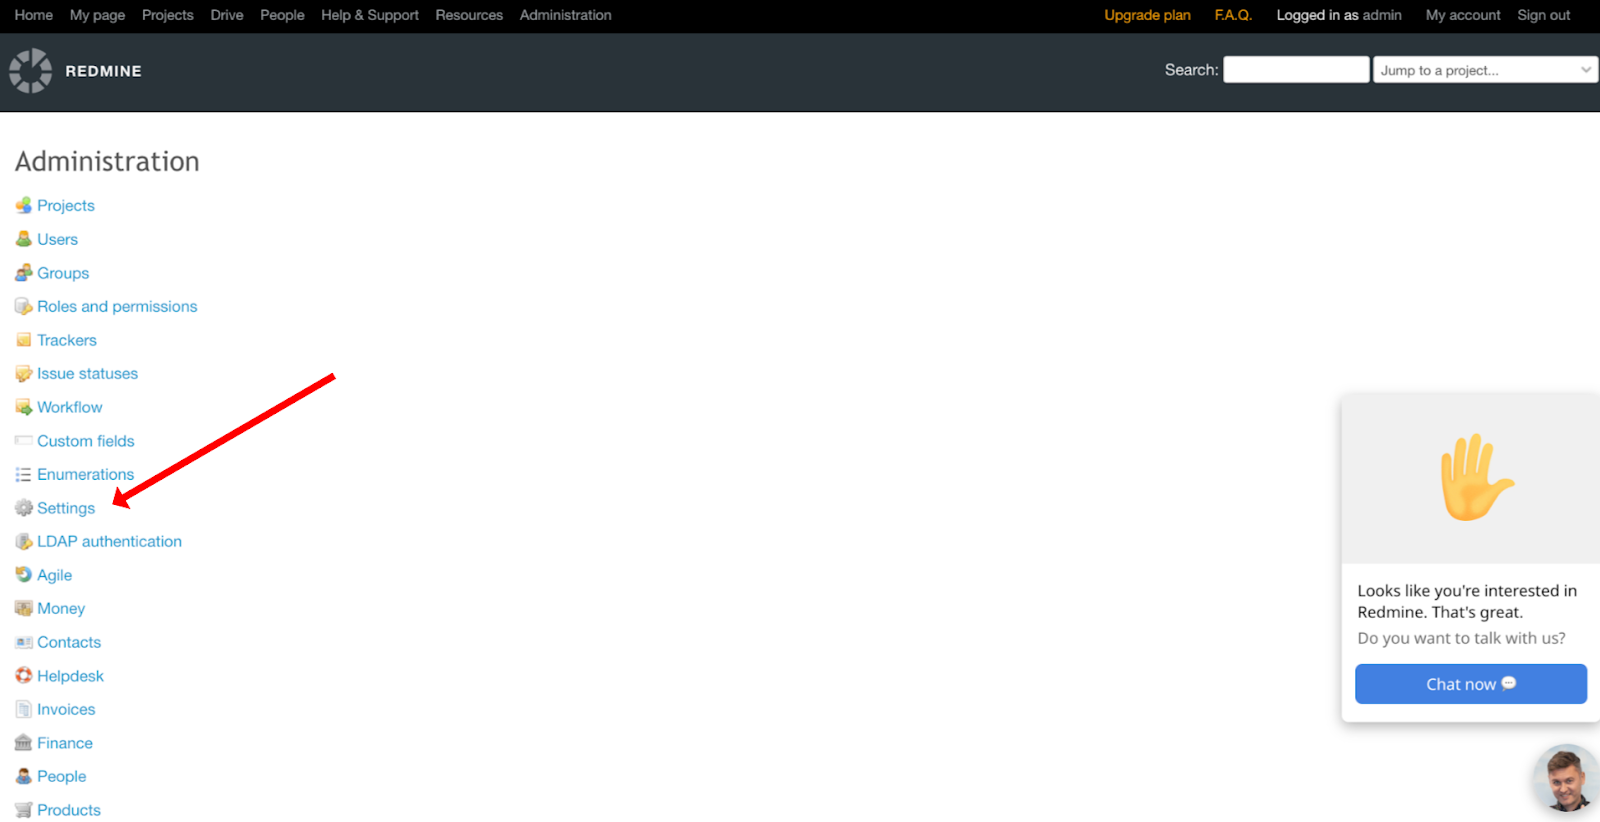
- From the main page click on the 'Administration' button in the header.
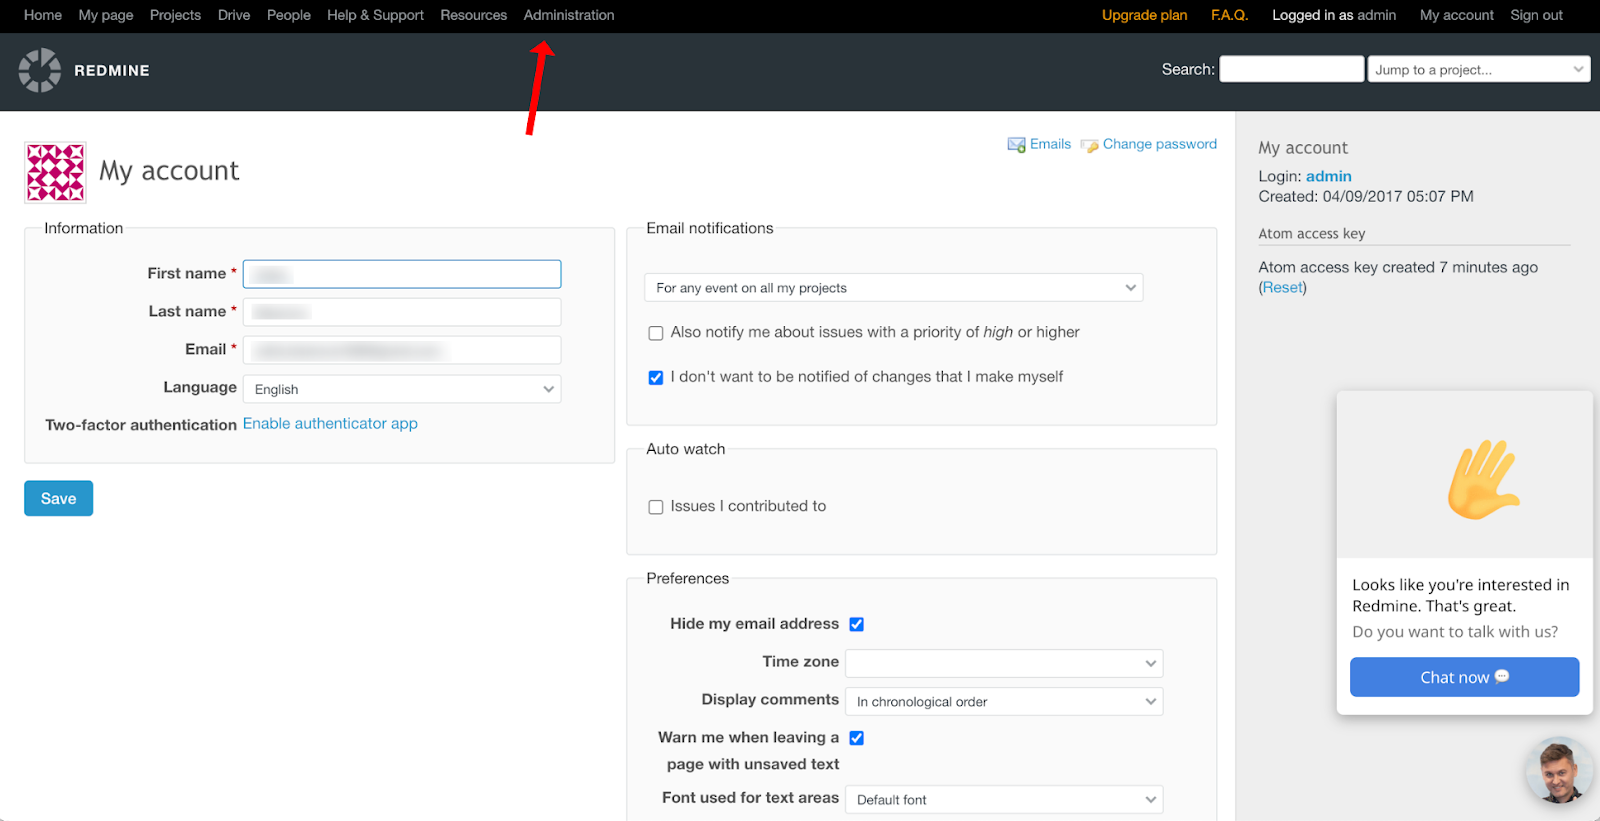
- Click on the ‘Settings’ link in the menu.
- Navigate to the ‘Api’ tab and mark the ‘Enable REST web service’ checkbox. Save changes by clicking on the 'Save' button.

- Navigate to the ‘My account’ page by clicking on the 'My account' button in the header.
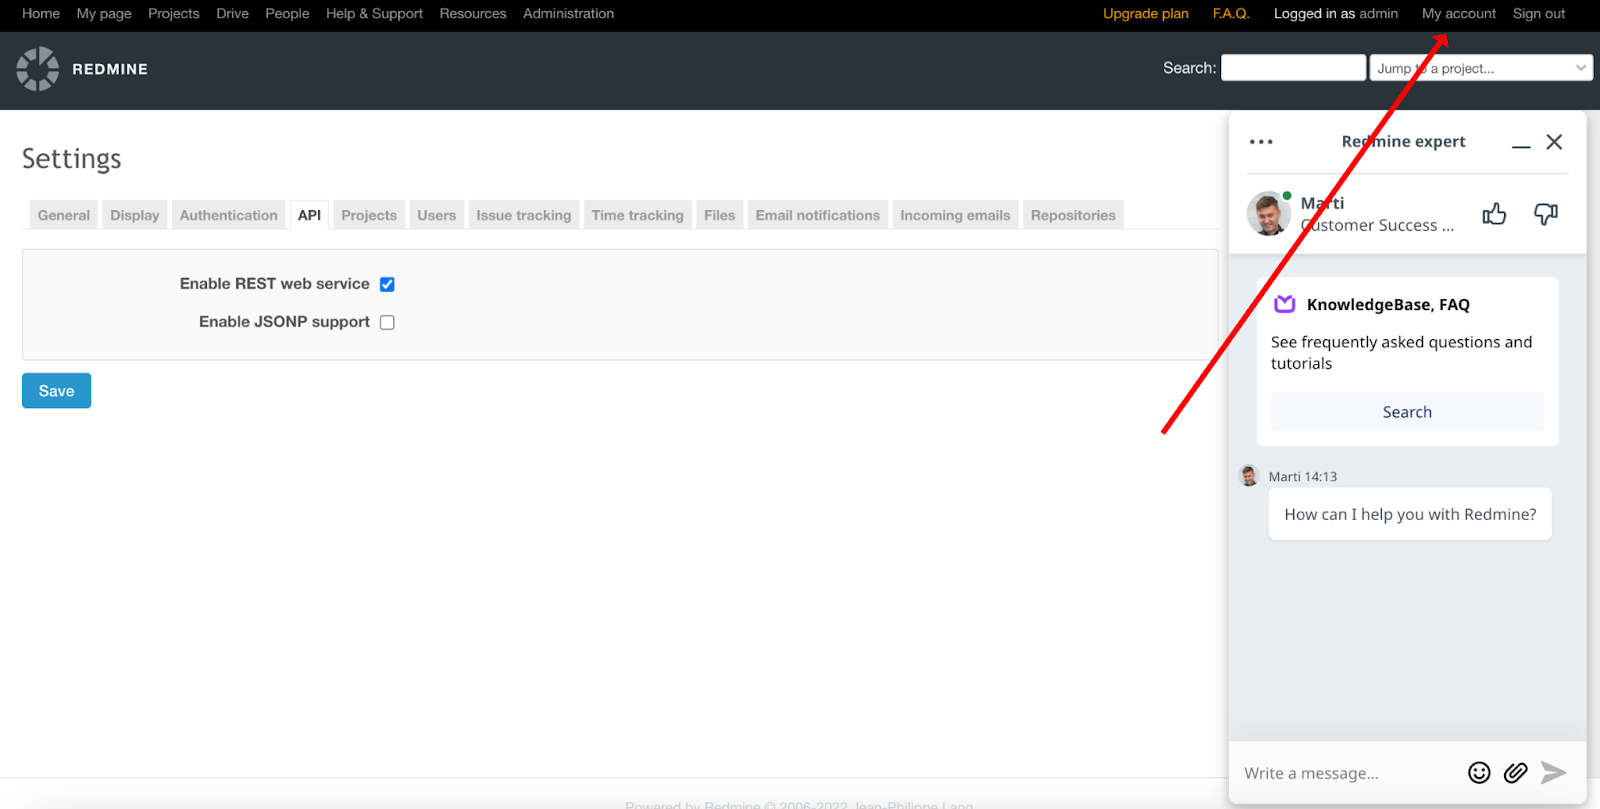
- Click on the 'Show' button in the side section, and copy your Personal access token to the clipboard.

2. Set up Connection
- After that, you need to navigate to your TestCaseLab Company Account, click on the Project Settings in the sidebar and go to the ‘Integrations’ tab.
- Choose the Redmine tool from the list of Bug tracking tools.
- Paste your Personal Access Token to the ‘Personal Access Token’ field.
- Go to your Redmine account and copy your URL. Example: https://YOURNAME.redmineup.com/
- Paste your Redmine URL to the ‘URL’ field in TestCaseLab and click on the 'Test connection' button.
- Choose your Redmine project from the project list and confirm the action.
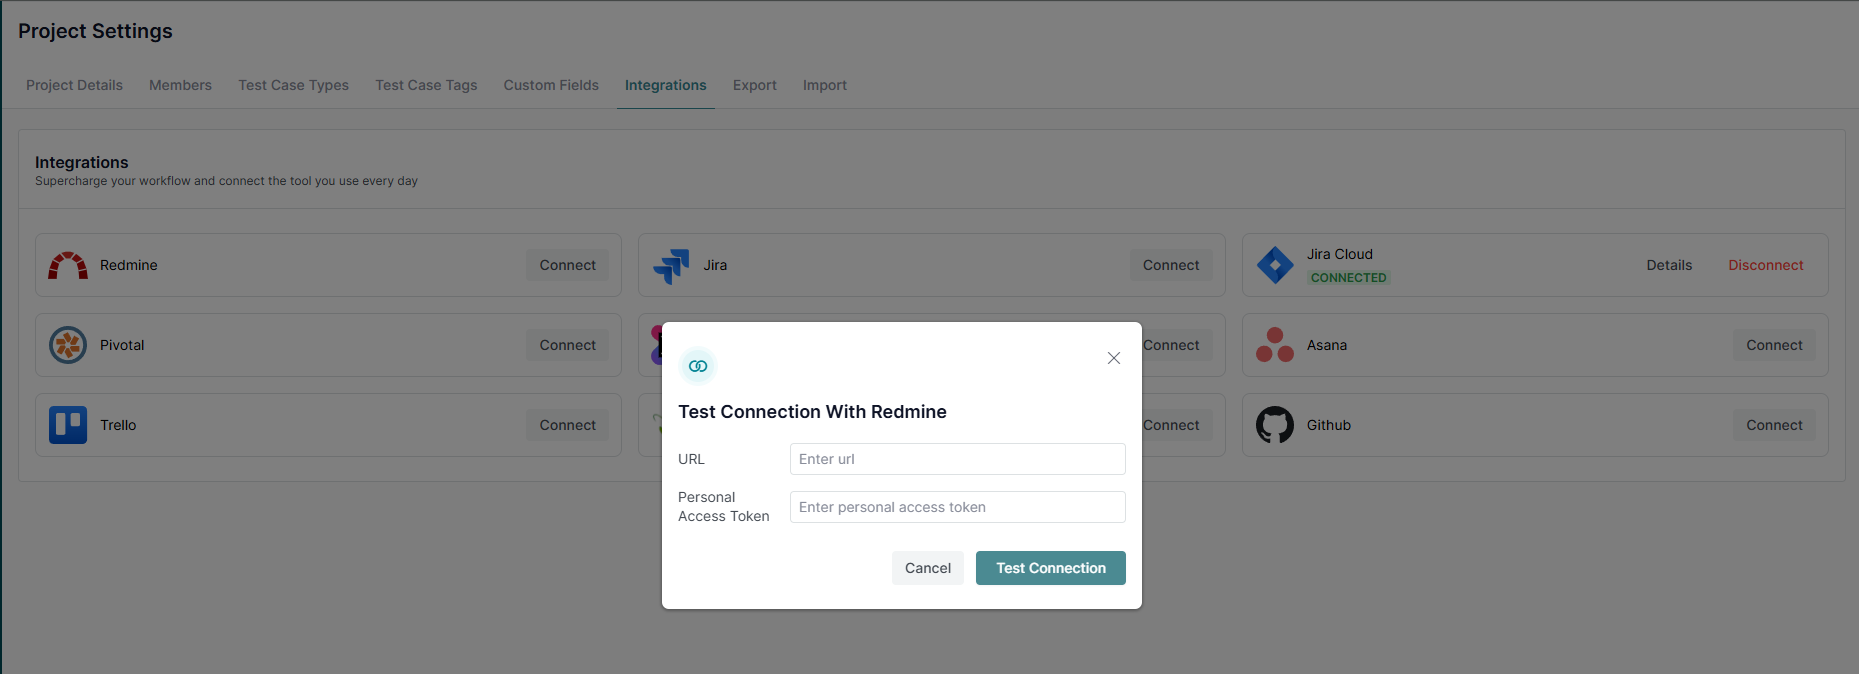
You will receive a 'Connected' notification once your connection has been established. Redmine can receive defects directly.
What’s Next?
For further assistance, check our related guides or contact support—we’re here to help!


.webp)
