Invite Project Members
Inviting team members to your project ensures smooth collaboration and proper access for everyone involved. Follow these steps to invite and manage members effectively.
1. Invite Members from Company Settings
As a Company Owner or Administrator:
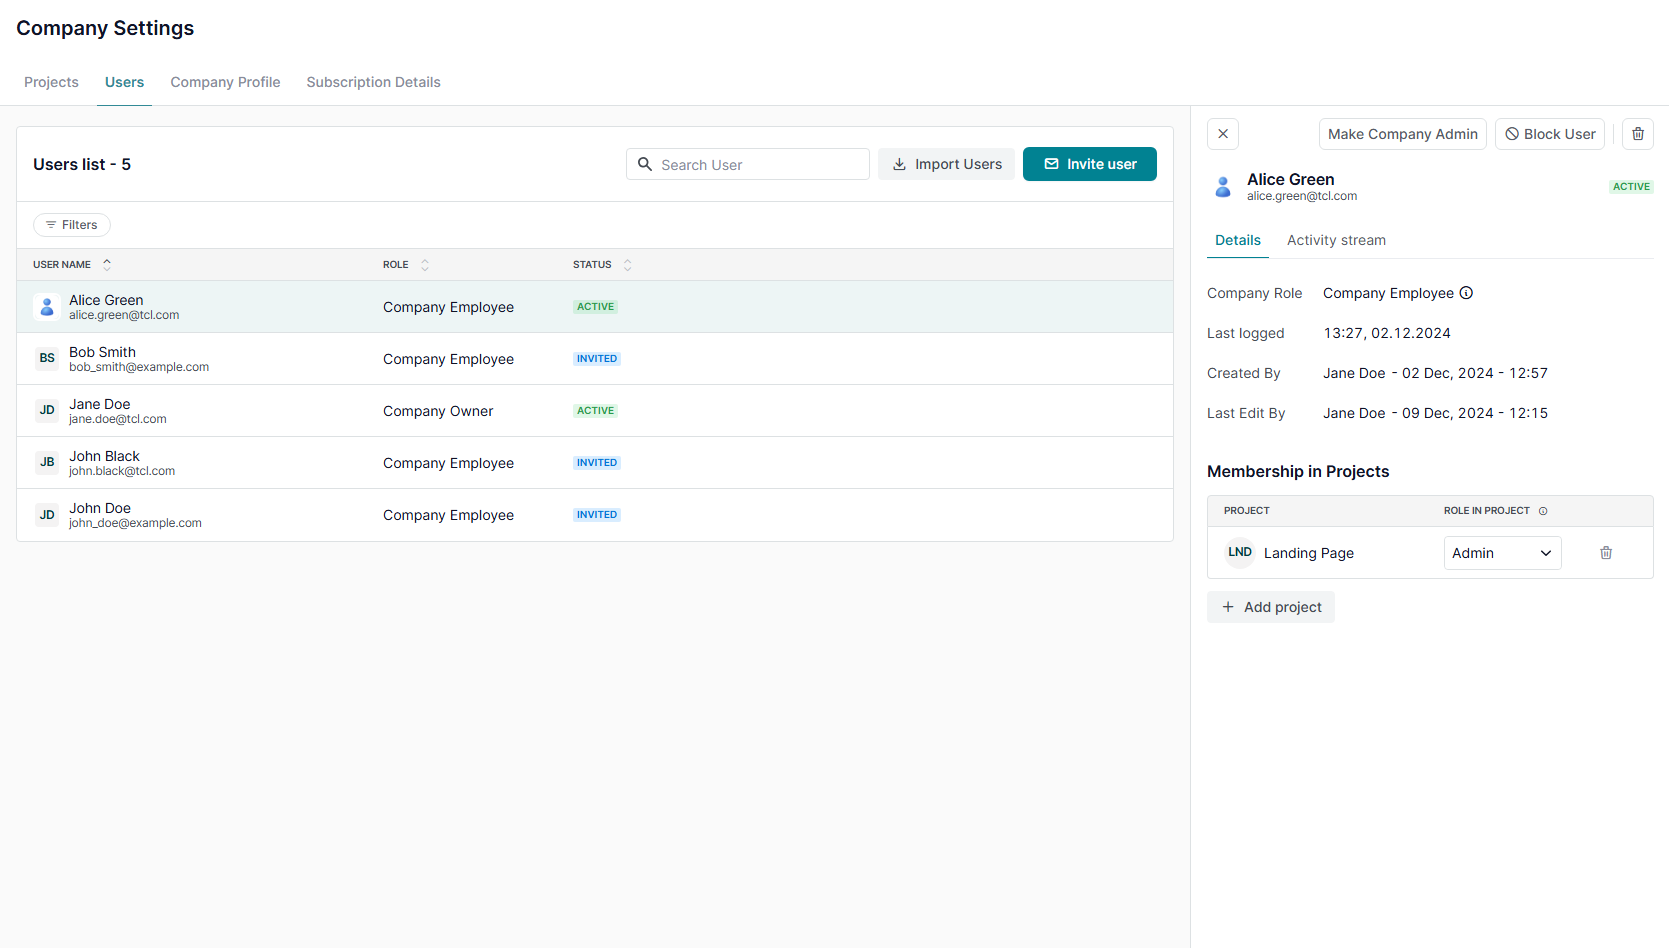
- Navigate to Company Settings > Users to invite users to the Company Account.
- Once users are added, you can assign them to specific projects in User Details via '+ Add Project' button.

2. Invite Members from Project Settings
As a Project Administrator:
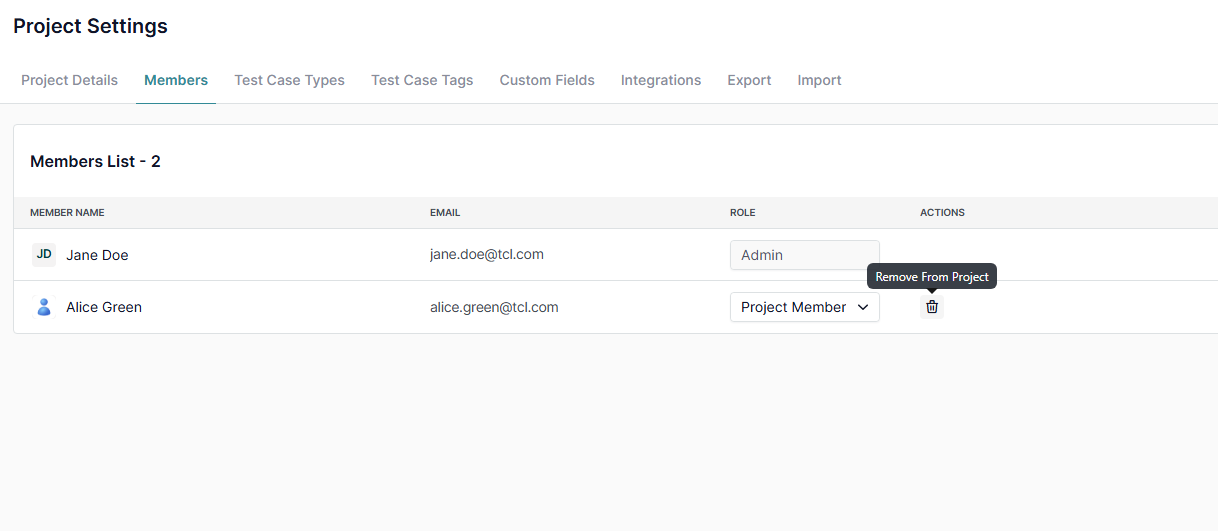
- Go to the specific project and navigate to Project Settings > Members.
- On the Members page:
- Click ‘Add Member.’
- Select users from the list of Active members in your Company Account.

3. Assign a Project Role
After adding a member to the project, assign them a role based on their responsibilities:
- Project Administrator:
- Full access to Project Settings and all project pages, including Test Cases, Test Plan, and Test Run.
- Project Member:
- Access to work on test cases and manage test plans and runs.
- Project Viewer:
- View-only access, suitable for stakeholders who need oversight without editing permissions.

Manage a Project Member
Managing project members helps ensure everyone has the correct level of access to contribute effectively. Here’s how you can manage project members using Company and Project Settings.
1. Manage Project Members from Company Settings
As a Company Administrator:
- Navigate to Company Settings > Users to manage all users within the Company Account, including their project assignments.
2. Manage Project Members from Project Settings
As a Project Administrator:
- Open the project and go to Project Settings > Members to directly manage members assigned to that specific project.
3. Remove a Project Member
On the Members page:
- Select the member you wish to remove.
- Confirm the removal to revoke their access to the project.

4. Change a Project Role
Update a member’s role by:
- Selecting a new role from the dropdown menu.
- Assigning roles based on their responsibilities (e.g., Administrator, Member, Viewer).
What’s Next?
Effectively managing project members ensures proper access control and smooth collaboration. For additional help, check related guides or reach out to our support team—we’re happy to assist!


.webp)


.webp)


