You can easily integrate your favorite test case management tool with the Trello testing tool! If you wondered how – take a look at the short manual below.
Learn how to set Jira Cloud test case management following the instructions below.
1. Generate API token
First of all, you should log in to your Atlassian account to integrate TestCaseLab with Jira Cloud.
Open your project in Jira.
Click on the ‘Gear’ icon on the main page and navigate to the ‘Atlassian account settings’ settings.
Jira Cloud - Go to Atlassian Account Settings
Navigate to the ‘Security’ tab, and click on 'Create and manage API tokens' button.
Security Tab
Click on 'Create Api Token' button.
Create API token
Fill in the ‘Name’ field and click on the 'Create' button.
Create API token
Copy your API token by clicking on 'Copy' button.
2. Set up Connection
Go to your TestCaseLab Company Account, that is a perfect option of test management tools for Jira, and open your Project.
Click on the Project Settings in the sidebar and navigate to the ‘Integrations’ tab
Choose the Jira Cloud issue-tracking tool from the list
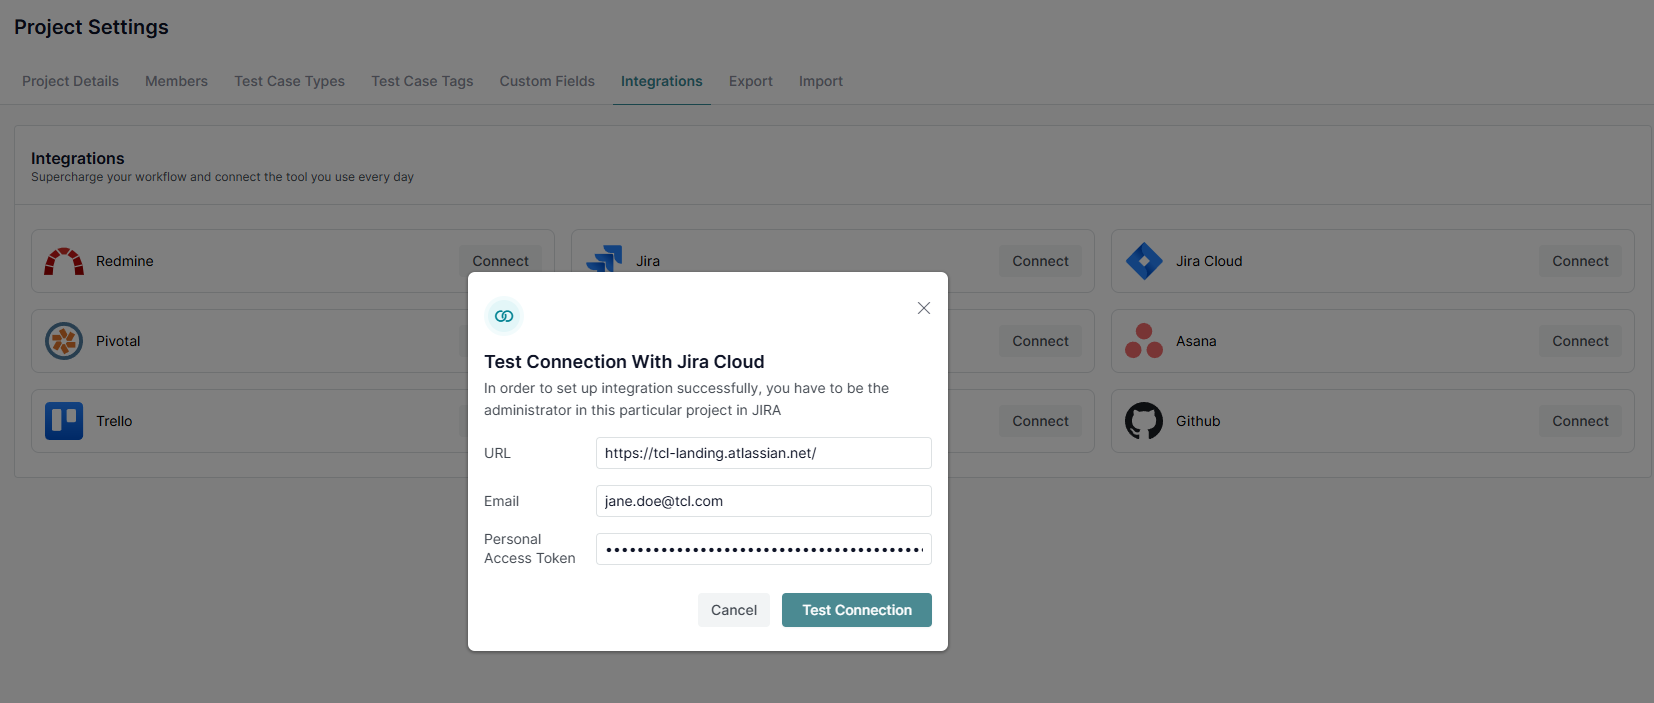
Enter your Jira Cloud URL (required format: http://YOURDOMAIN.atlassian.com/).
Enter your email address.
Paste your Personal Access Token.
Choose a Project from the dropdown list.
And confirm the action.
Example of Jira Cloud Integration Form
You can check your connection by clicking on the 'Test Connection' button. If there are no issues and the Connection is established, you can proceed with Integration and save the changes. Once you receive a ‘Connected’ notification, it means your connection is established with no issues and you can report your defects to Jira Cloud directly from TestCaseLab.
What’s Next?
For further assistance, check our related guides or contact support—we’re here to help!
Setting up integrations enables seamless communication between TestCaseLab and your bug-tracking tools. This simplifies defect reporting during test runs and enhances team collaboration. Follow this guide to set up and manage integrations.
1. Access the Integrations Page
Go to the specific project where you want to set up integration.
Navigate to Project Settings > Integrations to view all available bug tracker options.
Note: Only Project Administrators can access Project Settings.
Integrations
2. View Available Integrations
The Integrations page lists supported bug trackers, including:
Jira Cloud
Trello
Redmine
Jira (server-based)
Pivotal
YouTrack
Asana
Mantis
GitHub
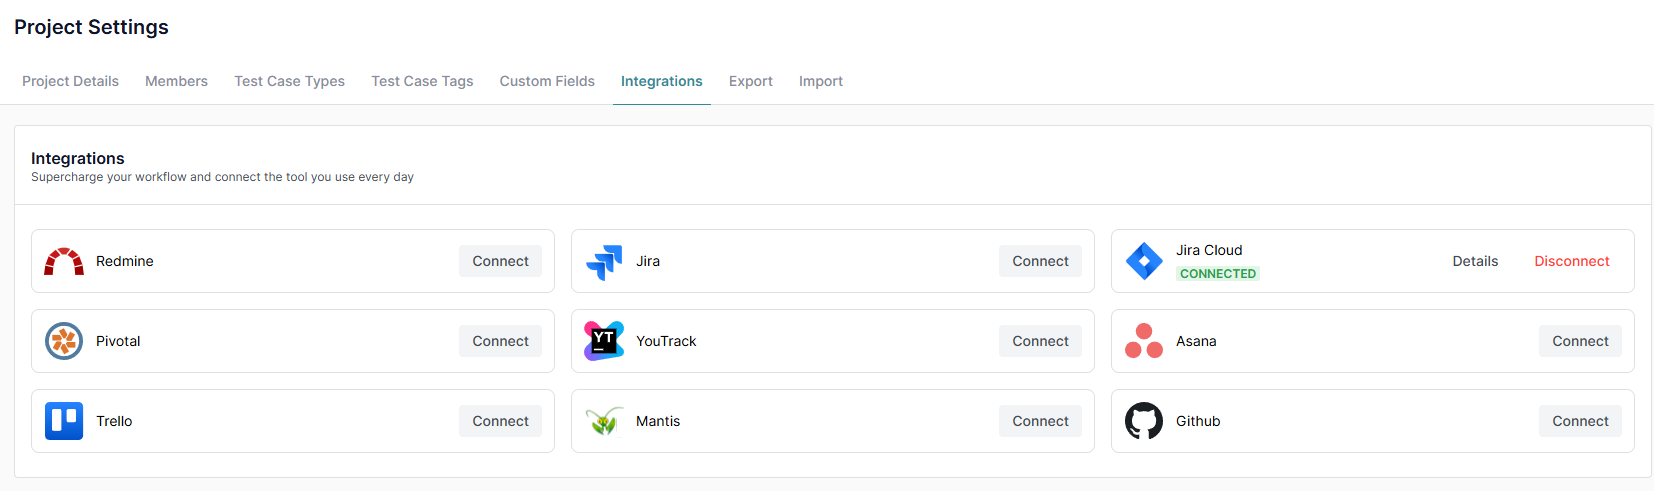
For integrations not yet connected, a ‘Connect’ button will appear on the corresponding integration card.
3. Connect a Bug Tracker
Click the ‘Connect’ button for your desired bug tracker.
Follow the prompts to authenticate and authorize the connection.
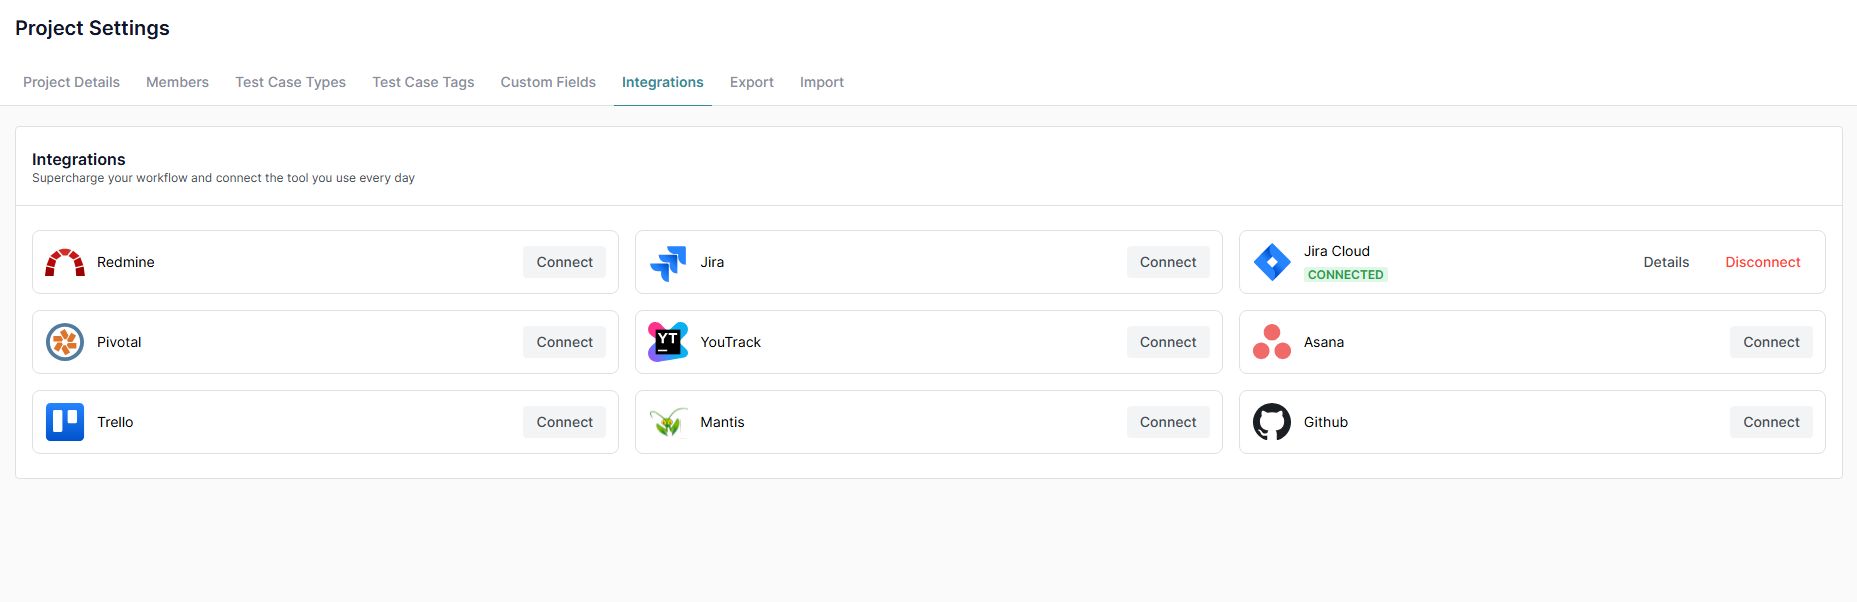
Once connected, the integration card will display:
‘Connected’ label.
‘Details’ Button: Test the connection in a pop-up modal.
‘Disconnect’ Button: Remove the integration if needed.
Connect a Bug Tracker
Connected Integration
4. Manage Pending Integrations
Only one active integration is allowed at a time.
If you connect a new bug tracker while another is already active:
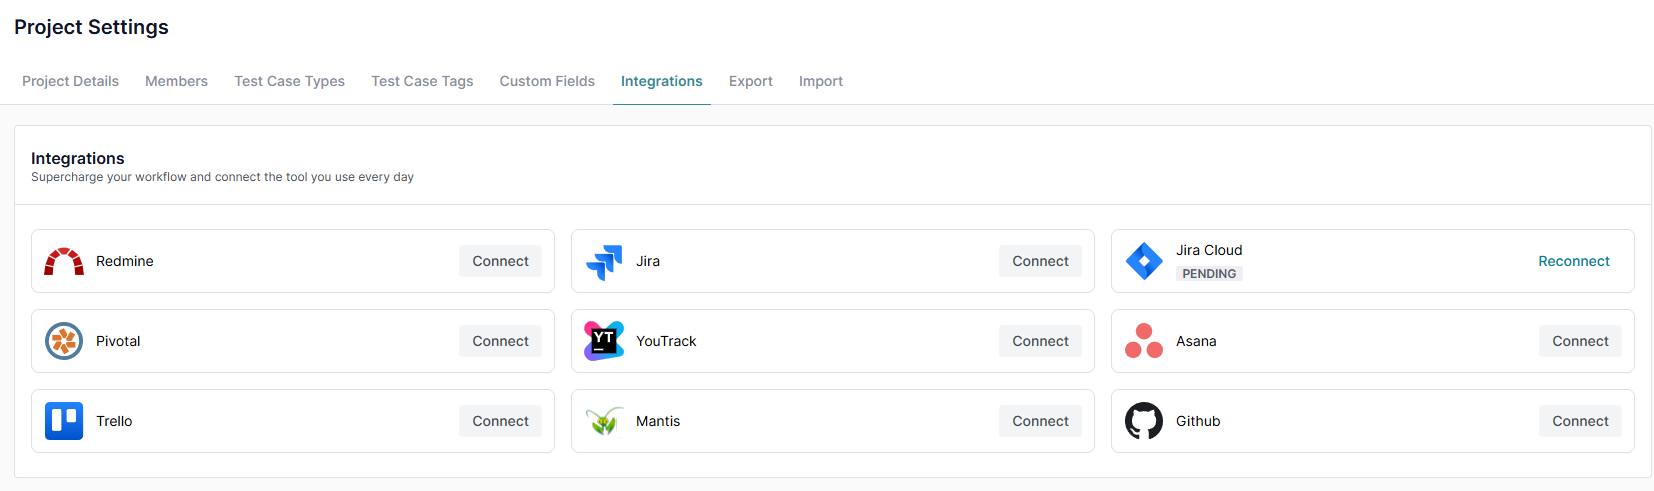
The previous integration will switch to ‘Pending’ status.
A ‘Reconnect’ button will appear, allowing you to reactivate the previous integration if needed.
Pending Integration
What’s Next?
For further assistance, check our related guides or contact support—we’re here to help!
Importing test cases allows you to quickly populate your project and start managing them efficiently. Follow these simple steps to upload your test cases using a CSV file.
1. Download the CSV Template
Go to the project where you want to import test cases.
Navigate to the Project Settings > Import
Download the provided CSV file sample to use as a template for your test case data.
Note: Only Project Administrators can access Project Settings.
Download CSV Template
2. Open the Sample CSV File
Locate the downloaded example.csv file on your computer.
Open the file to view a few sample test cases and understand the required structure for importing.
CSV template for import of Test Cases
3. Fill in the CSV File
Add your test cases to the file, following the provided structure.
Ensure the following required fields are completed:
Title: Enter the name of each test case.
Priority: Specify the importance of the test case (e.g., High, Medium, Low).
Once all test cases are added, save the file.
4. Upload the CSV File
Return to TestCaseLab and navigate to the project where the test cases will be imported.
Select the prepared CSV file and upload it to import your test cases into the project.
Upload a CSV file
Export Test Cases from a Project
Exporting test cases allows you to back up, share, or re-import your data efficiently. Follow these steps to download your test cases in CSV format.
1. Initiate Export
Navigate to the project containing the test cases you want to export.
Navigate to the Project Settings > Export
Select the Export option to start the download process.
Note: Only Project Administrators can access Project Settings.
Go to Export page
2. CSV Document Structure
The exported CSV file includes the following information:
Default Fields:
Title: Name of the test case.
Description: Detailed information (precondition) of the test case.
Steps: Steps to execute the test case.
Expected Results: Anticipated outcomes for the test case.
Category: Hierarchical Suite path (e.g., Feature -> Sub-feature).
Tags: Tags assigned to the test case.
Created At: Date and time the test case was created.
Created By: User who created the test case.
Last Edit At: Date and time of the last edit.
Last Edit By: User who made the last edit.
Custom Fields:
Any additional fields configured in your project, such as:
Custom Text: Text fields specific to your test cases.
Custom Dropdown: Dropdown values defined for your project.
Example of CSV file with exported Test Cases
3. Download the File
Save the exported CSV file to your computer.
Use it for analysis, sharing with team members, or as a template for importing test cases back into TestCaseLab.
What’s Next?
Leverage the exported file for easy data management and collaboration. If you need guidance on importing test cases, check out our related articles or contact support—we’re happy to assist!
Inviting team members to your project ensures smooth collaboration and proper access for everyone involved. Follow these steps to invite and manage members effectively.
1. Invite Members from Company Settings
As a Company Owner or Administrator:
Navigate to Company Settings > Users to invite users to the Company Account.
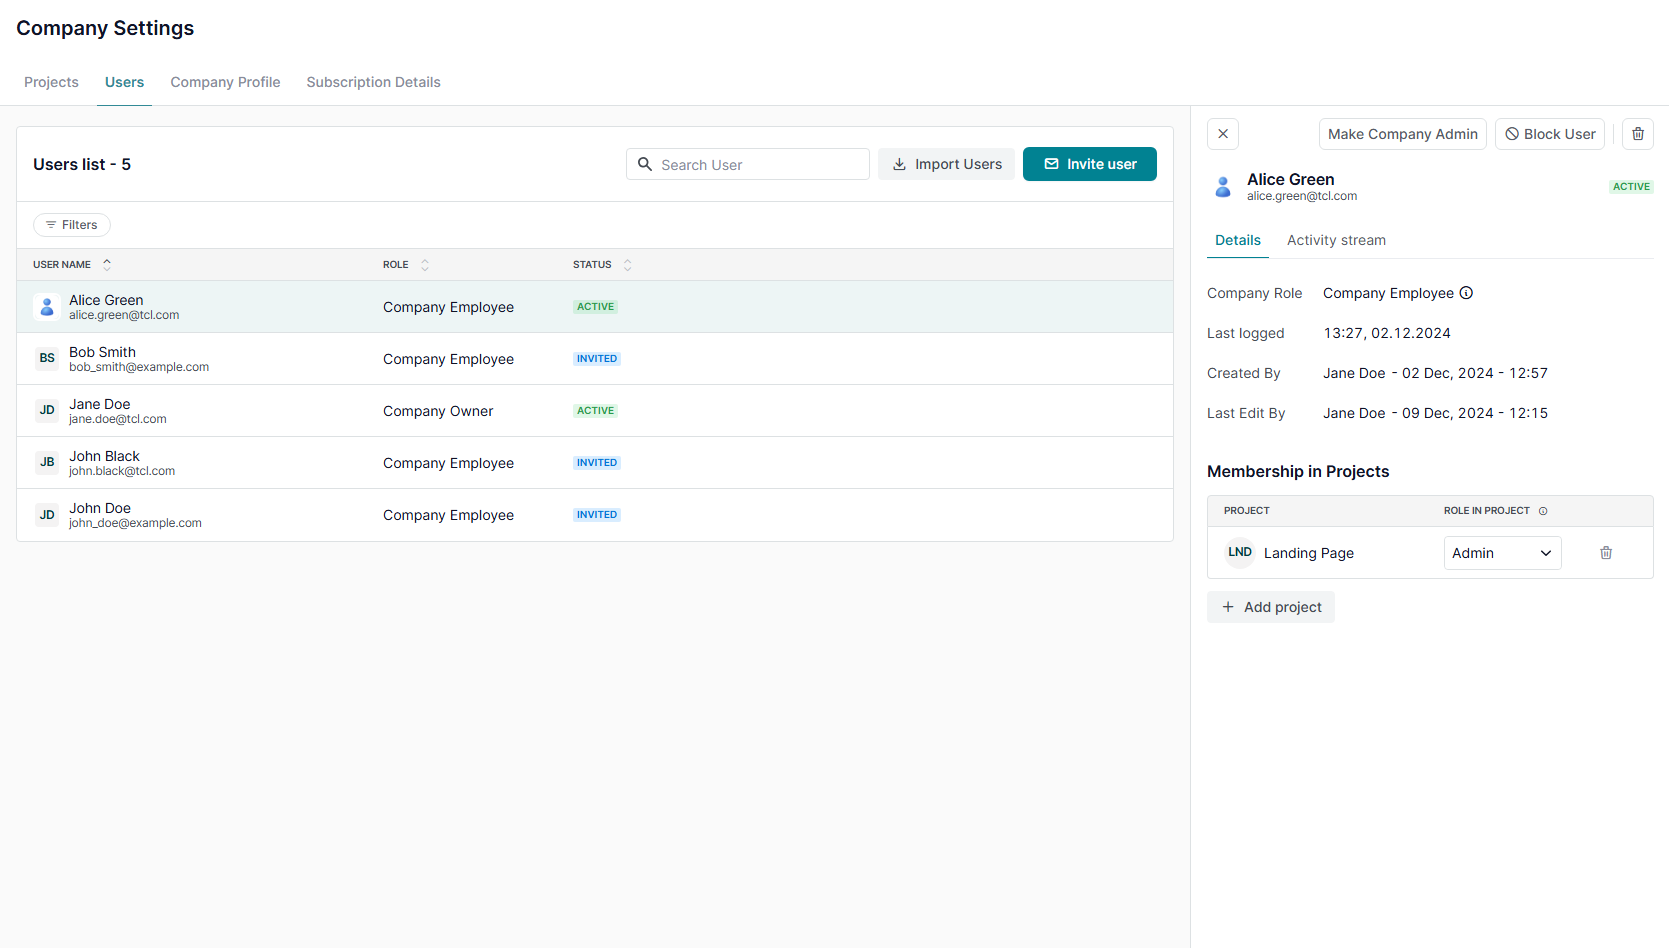
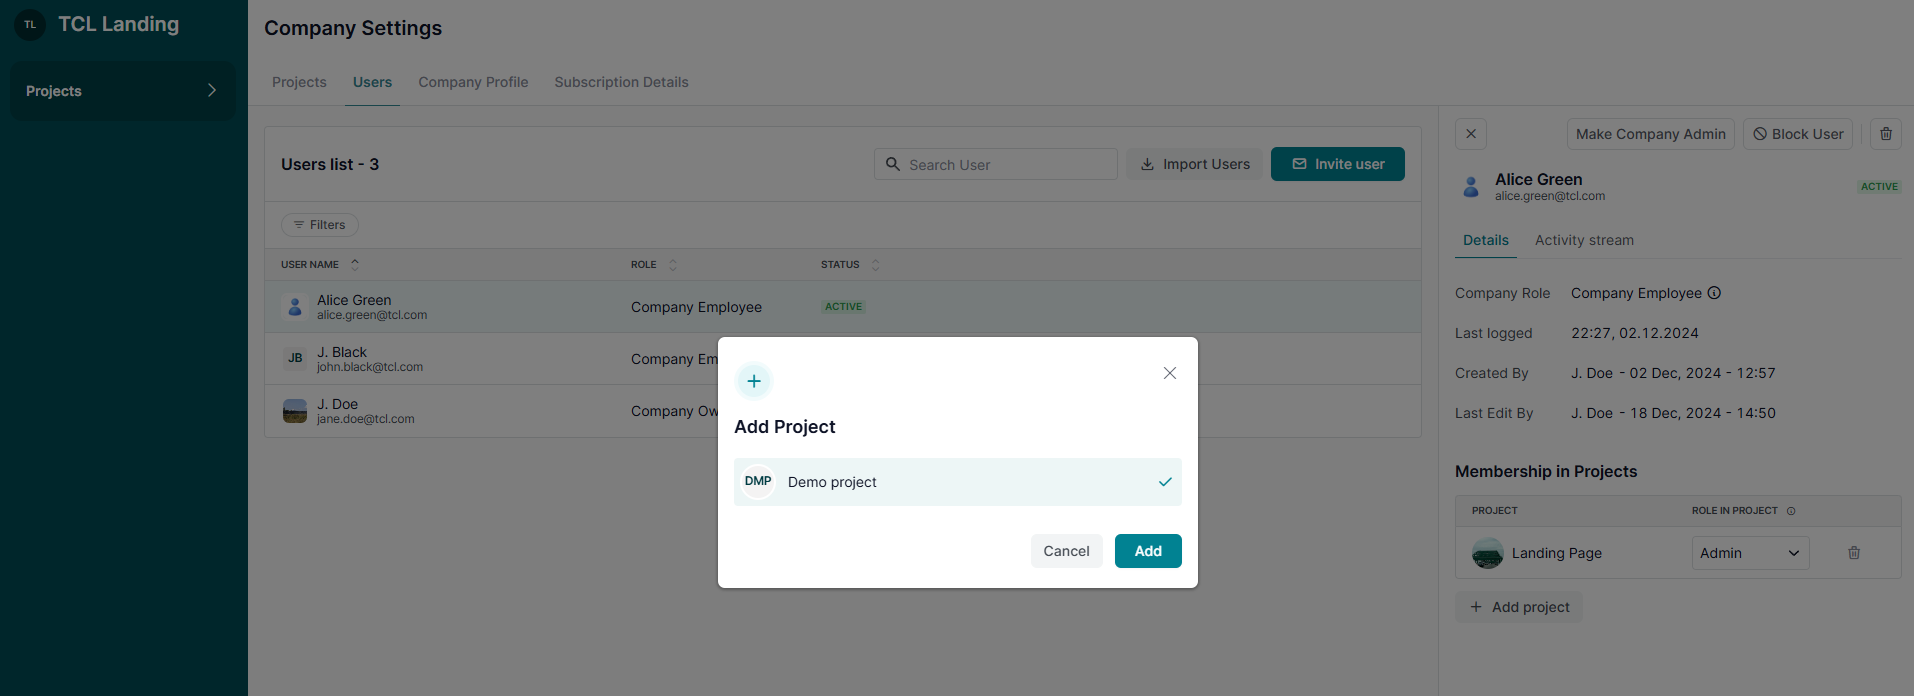
Once users are added, you can assign them to specific projects in User Details via '+ Add Project' button.
User Details
2. Add Members from Project Settings
As a Project Administrator:
Go to the specific project and navigate to Project Settings > Members.
On the Members page click ‘Add Member.’
Select one or more users from the list of Active members in your Company Account.
Use search to quickly find the users you want to add.
Selected users will appear in the field as chips.
Add a Project Member
3. Assign a Project Role
Choose the project role that should be applied to all selected users:
Project Administrator:
Full access to Project Settings and all project pages, including Test Cases, Requirements, Test Plan, Milestones, and Test Run.
Project Member:
Access to work on test cases and manage test plans and runs.
Project Viewer:
View-only access, suitable for stakeholders who need oversight without editing permissions.
Note: The selected role is applied to all users added in the same action. To assign different roles, add users separately or update their roles after they are added.
Project Roles
4. Add Selected Members
After selecting users and choosing a role:
Click ‘Add Member’ to add the selected users to the project.
The modal will close after submission.
The Members list will refresh and show newly added users.
If some users cannot be added, valid users will still be added successfully. You will see a notification with the users who were not added.
5. Invite New Users
The ‘Invite new user’ link remains available and works separately from adding existing company users to a project.
Use it when the person you need is not yet part of your Company Account.
Note: Bulk adding project members works only for existing company users. Inviting new users is handled through the existing invite flow.
Manage a Project Member
Managing project members helps ensure everyone has the correct level of access to contribute effectively. Here’s how you can manage project members using Company and Project Settings.
1. Manage Project Members from Company Settings
As a Company Administrator:
Navigate to Company Settings > Users to manage all users within the Company Account, including their project assignments.
2. Manage Project Members from Project Settings
As a Project Administrator:
Open the project and go to Project Settings > Members to directly manage members assigned to that specific project.
3. Remove a Project Member
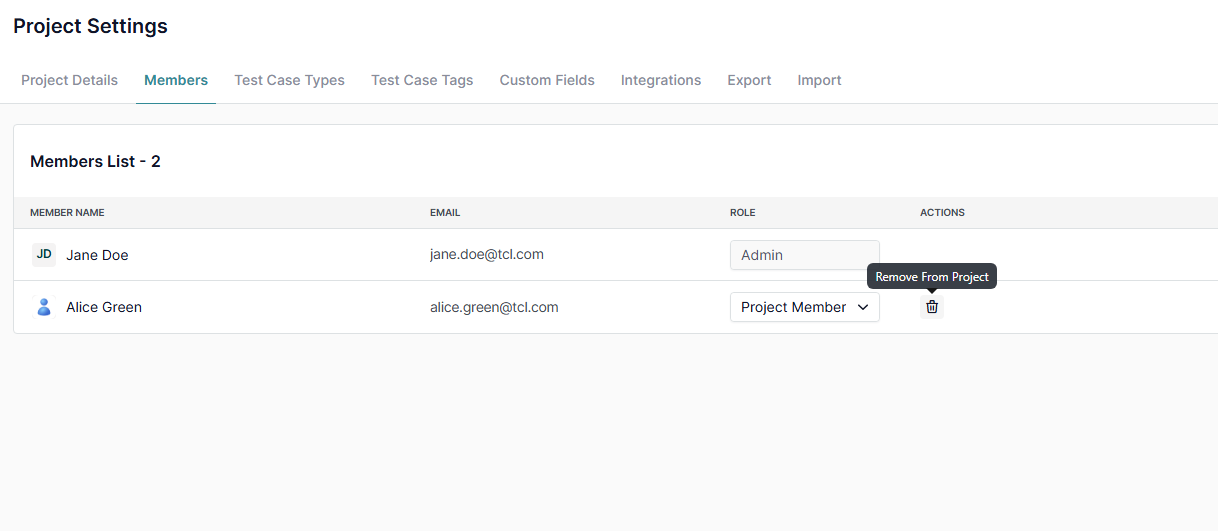
On the Members page:
Select the member you wish to remove.
Confirm the removal to revoke their access to the project.
Remove User from a Project
4. Change a Project Role
Update a member’s role by:
Selecting a new role from the dropdown menu.
Assigning roles based on their responsibilities (e.g., Administrator, Member, Viewer).
What’s Next?
Effectively managing project members ensures proper access control and smooth collaboration. For additional help, check related guides or reach out to our support team—we’re happy to assist!
TestCaseLab allows you to create unlimited projects within your Company Account, ensuring flexibility for managing all your testing needs.
Manage Project
Effectively managing projects in TestCaseLab ensures smooth collaboration and keeps your team organized. Here’s a step-by-step guide to manage project settings, members, and more.
1. Access Project Settings
To open the settings:
Click the three-dot menu next to the project name on the Dashboard and choose Project Details, or
Navigate to the project and select Project Settings from the sidebar.
Note: Only Project Administrators have access to Project Settings.
Go to Project Settings via Dashboard
2. Edit Project Information
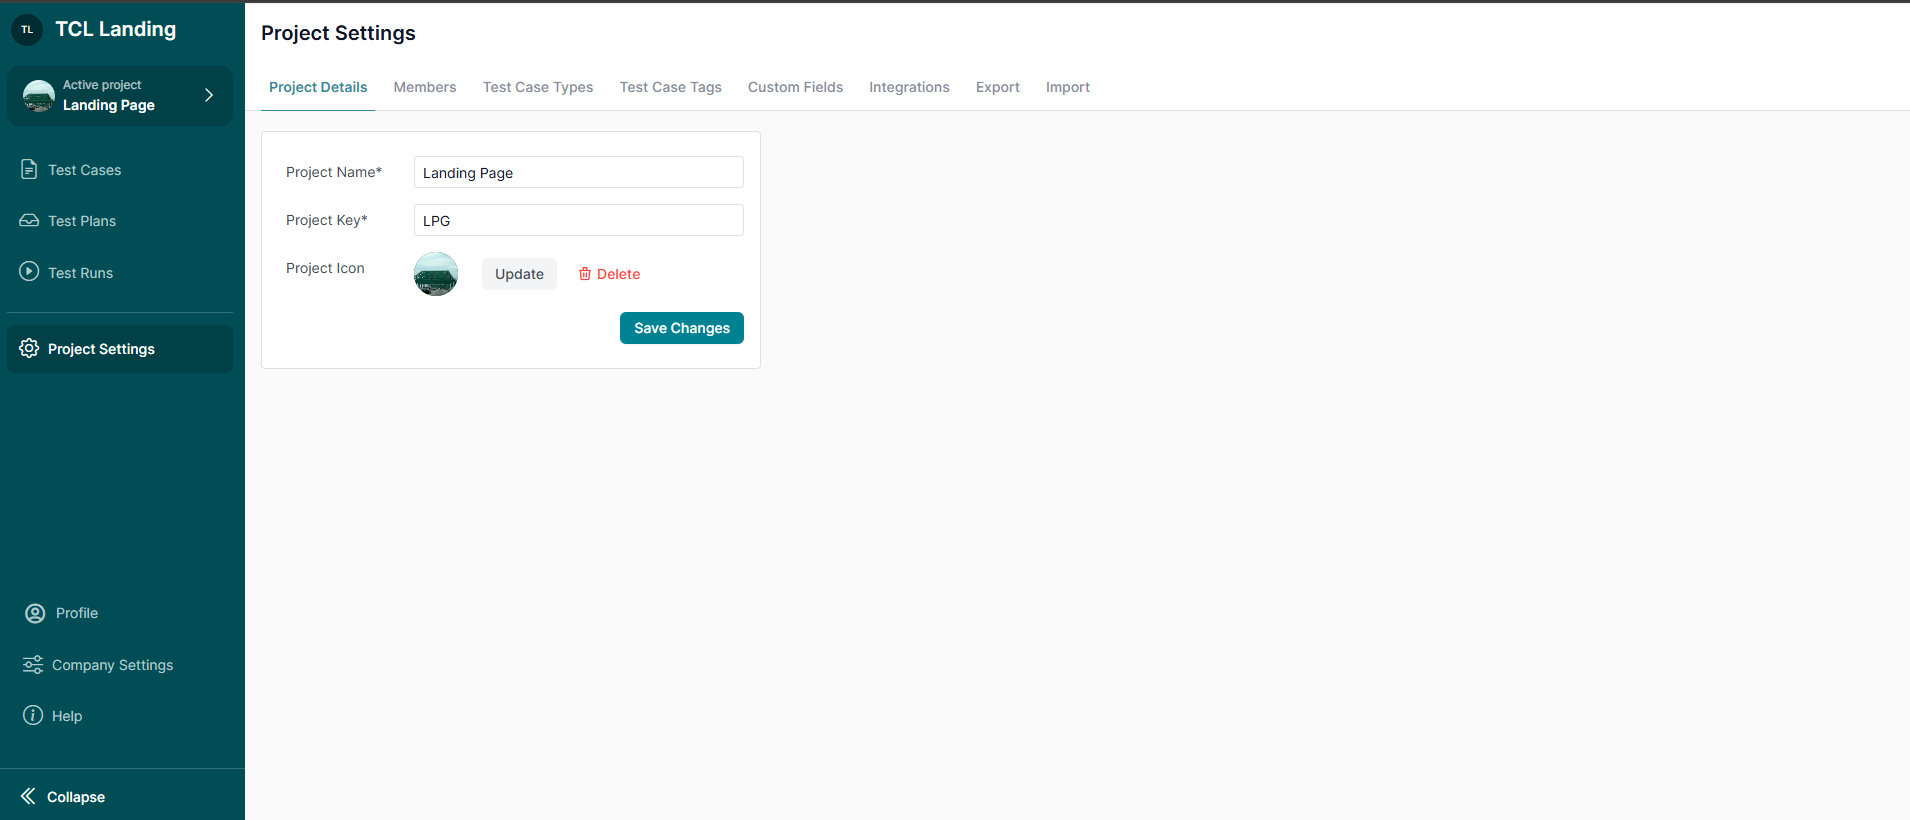
In the Project Settings > Project Details, you can:
Update the Project Name to reflect any changes.
Change the Project Key if needed.
Add or Update the Project Logo for better project identification.
Edit Project Details
3. Manage Project Members
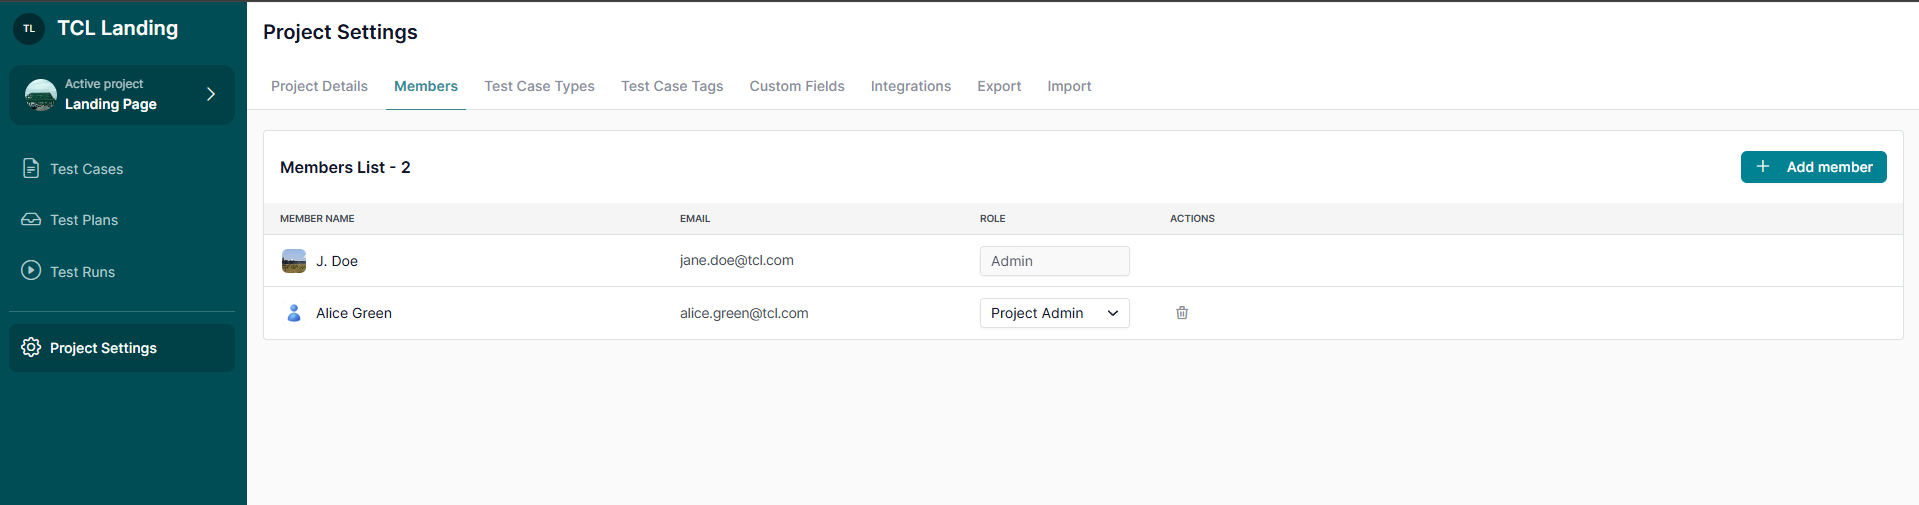
Go to Project Settings > Members to:
Invite new team members.
Manage existing project members’ roles and access.
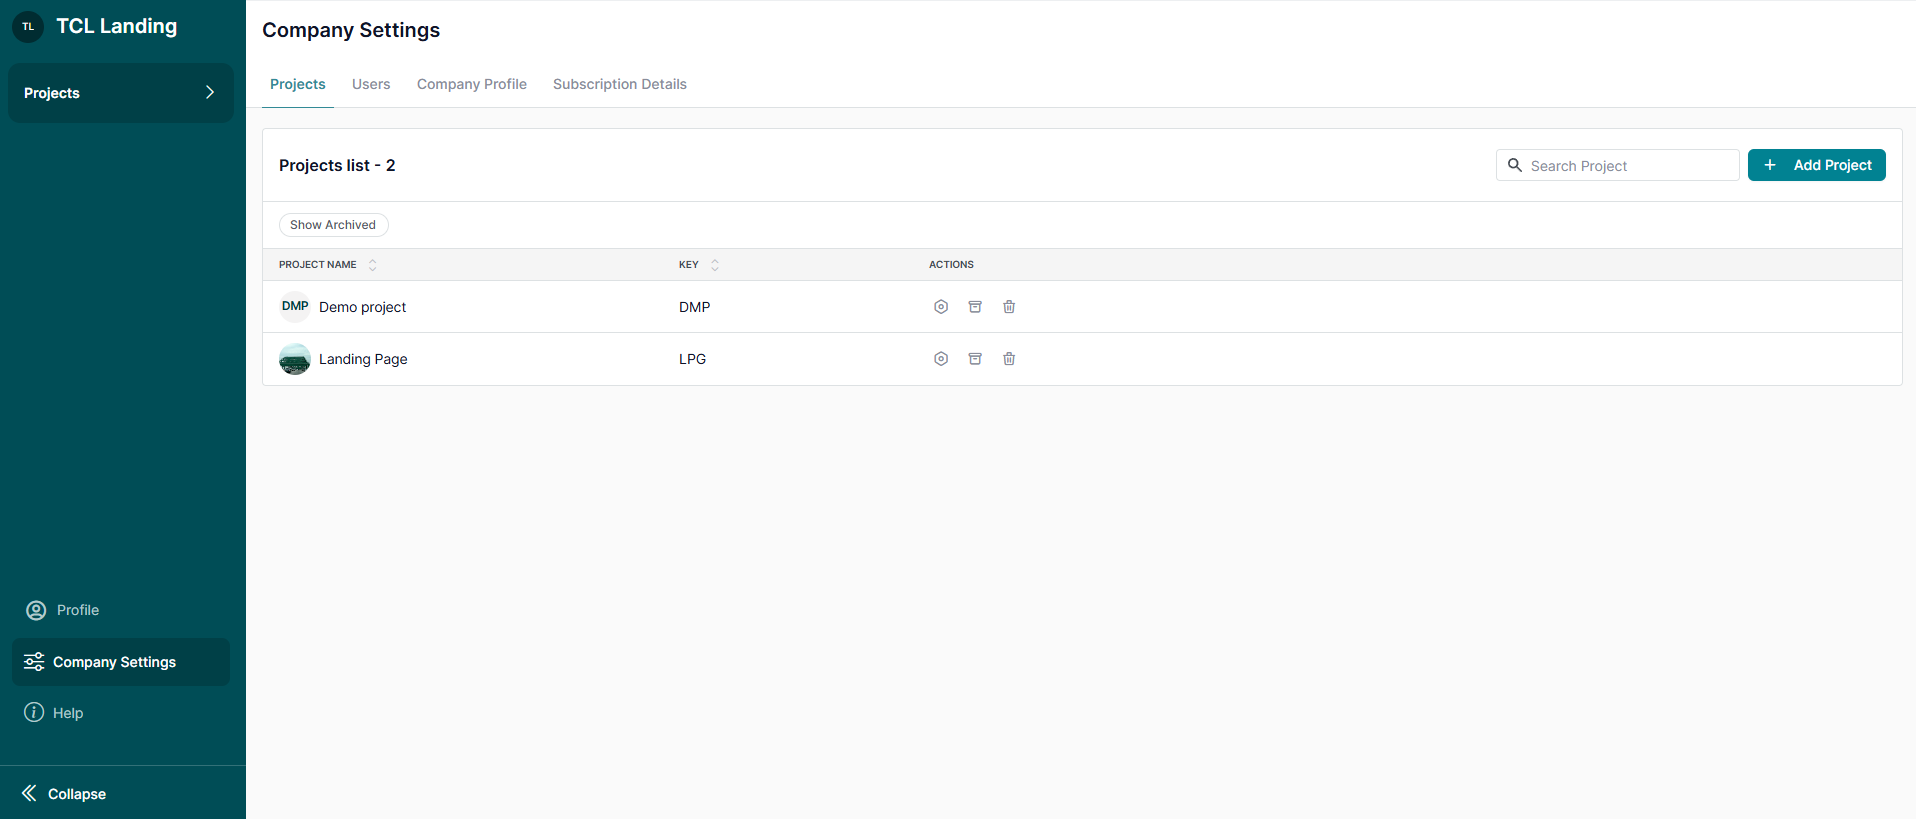
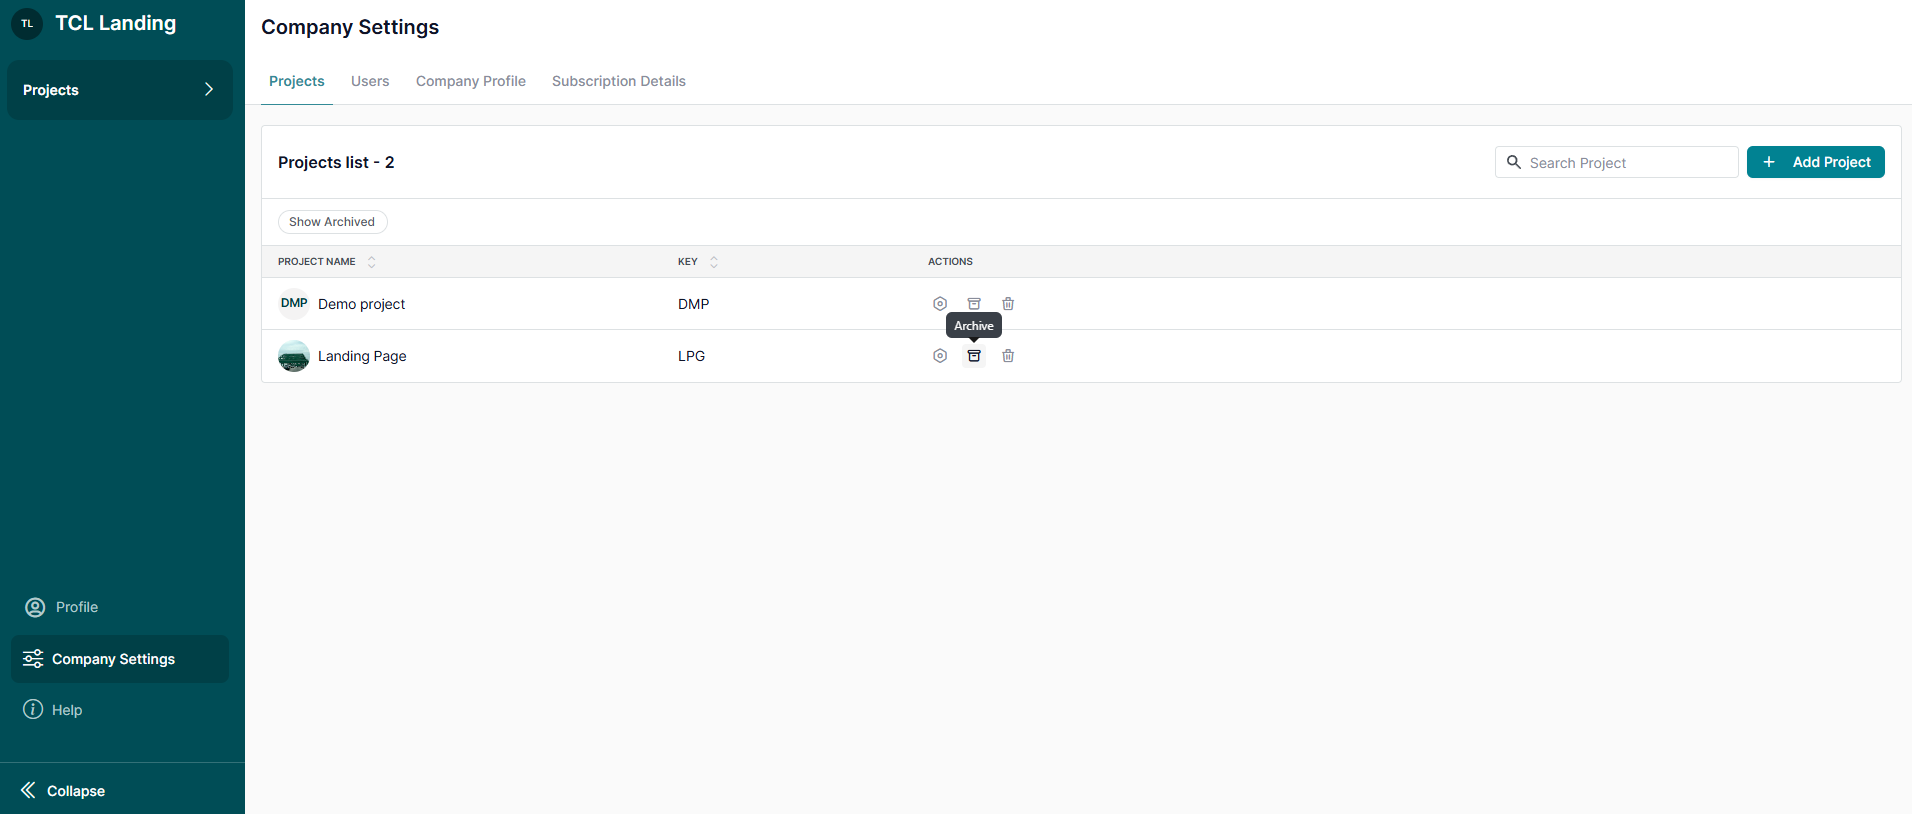
Go to Company Settings > Projects, select the project, and choose the appropriate option.
Note 1: Deleted projects cannot be restored.
Note 2: Only a Company Administrator can archive or delete a project.
Archive a Project
Pin Important Projects
You can pin projects that you use most often to keep them at the top of your project list.
Pinned projects appear first in the Company Projects Dashboard
Pinning is personal for each user. If you pin a project, it does not affect the project order for other team members.
1. Pin a Project
Go to the Dashboard.
Find the project you want to keep at the top.
Click the pin icon on the project card.
Once pinned, the project will move to the top of the project list.
2. Unpin a Project
To remove a project from your pinned list:
Go to the Dashboard.
Click the filled pin icon on the pinned project card.
The project will return to the regular project order.
3. Understand Project Ordering
Pinned projects are always shown first.
If you pin several projects, the most recently pinned project appears at the top of the pinned group.
Unpinned projects keep the standard project ordering used in your account.
4. Pin Limit
Each user can pin up to 5 projects.
If you already have 5 pinned projects and try to pin another one, the project will not be pinned.
Note: To pin another project, unpin one of your currently pinned projects first.
What’s Next?
By managing projects effectively, you can streamline your testing processes and enhance collaboration. For more guidance, explore related articles or reach out toour support team—we’re here to help!





.png)


.webp)