Blog

Make the most out of your experience and check
articles about TestCaseLab functionality

Use AI Assistant to Create Test Cases and Requirements
icon calendar
July 1, 2026

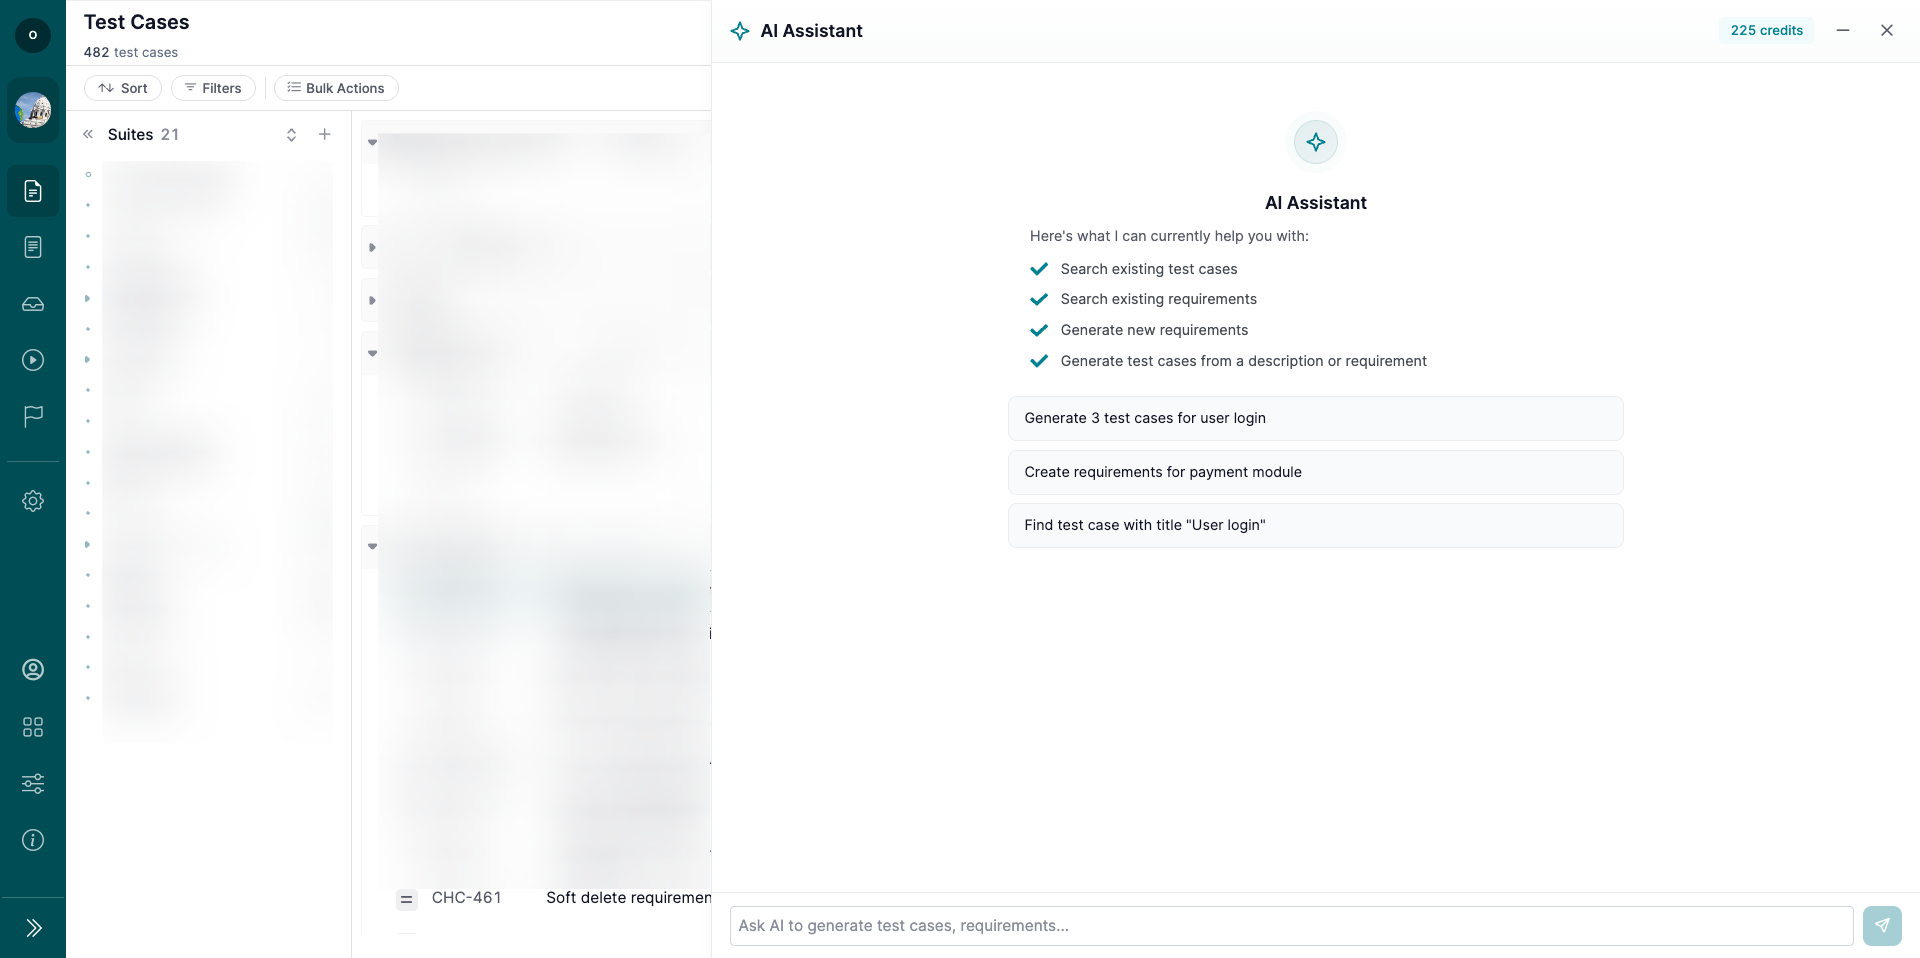
The AI Assistant helps you create and review QA artifacts inside your project using natural language.

In the current version, you can use the AI Assistant to:

  • Create Test Cases from scratch.
  • Create Requirements from scratch.
  • Create Test Cases based on existing Requirements.
  • Ask questions about existing Test Cases and Requirements.

The AI Assistant works only with the project you currently have open.

1. Open the AI Assistant

To open the AI Assistant:

  • Open a project.
  • Click the AI Assistant button.
  • Enter your request in the chat panel.

You can describe what you want to create or ask a question about existing Test Cases and Requirements.

Note: The AI Assistant uses the current project context only.

2. Create Test Cases from Scratch

You can ask the AI Assistant to create new Test Cases by describing the feature, flow, or scenario you want to cover.

For example, you can provide:

  • Feature name.
  • User flow.
  • Preconditions.
  • Expected behavior.
  • Edge cases.
  • Priority or type, if needed.

The AI Assistant will prepare Test Cases based on your request and show a preview before creating them.

Review the preview carefully, then confirm the action if everything looks correct.

3. Create Requirements from Scratch

You can ask the AI Assistant to create Requirements by describing the product functionality or business need.

For example, you can provide:

  • Feature description.
  • User goal.
  • Business rule.
  • Expected behavior.
  • Constraints or acceptance conditions.

The AI Assistant will prepare Requirements based on your request and show them for review before saving.

Note: You should review generated Requirements before confirming creation.

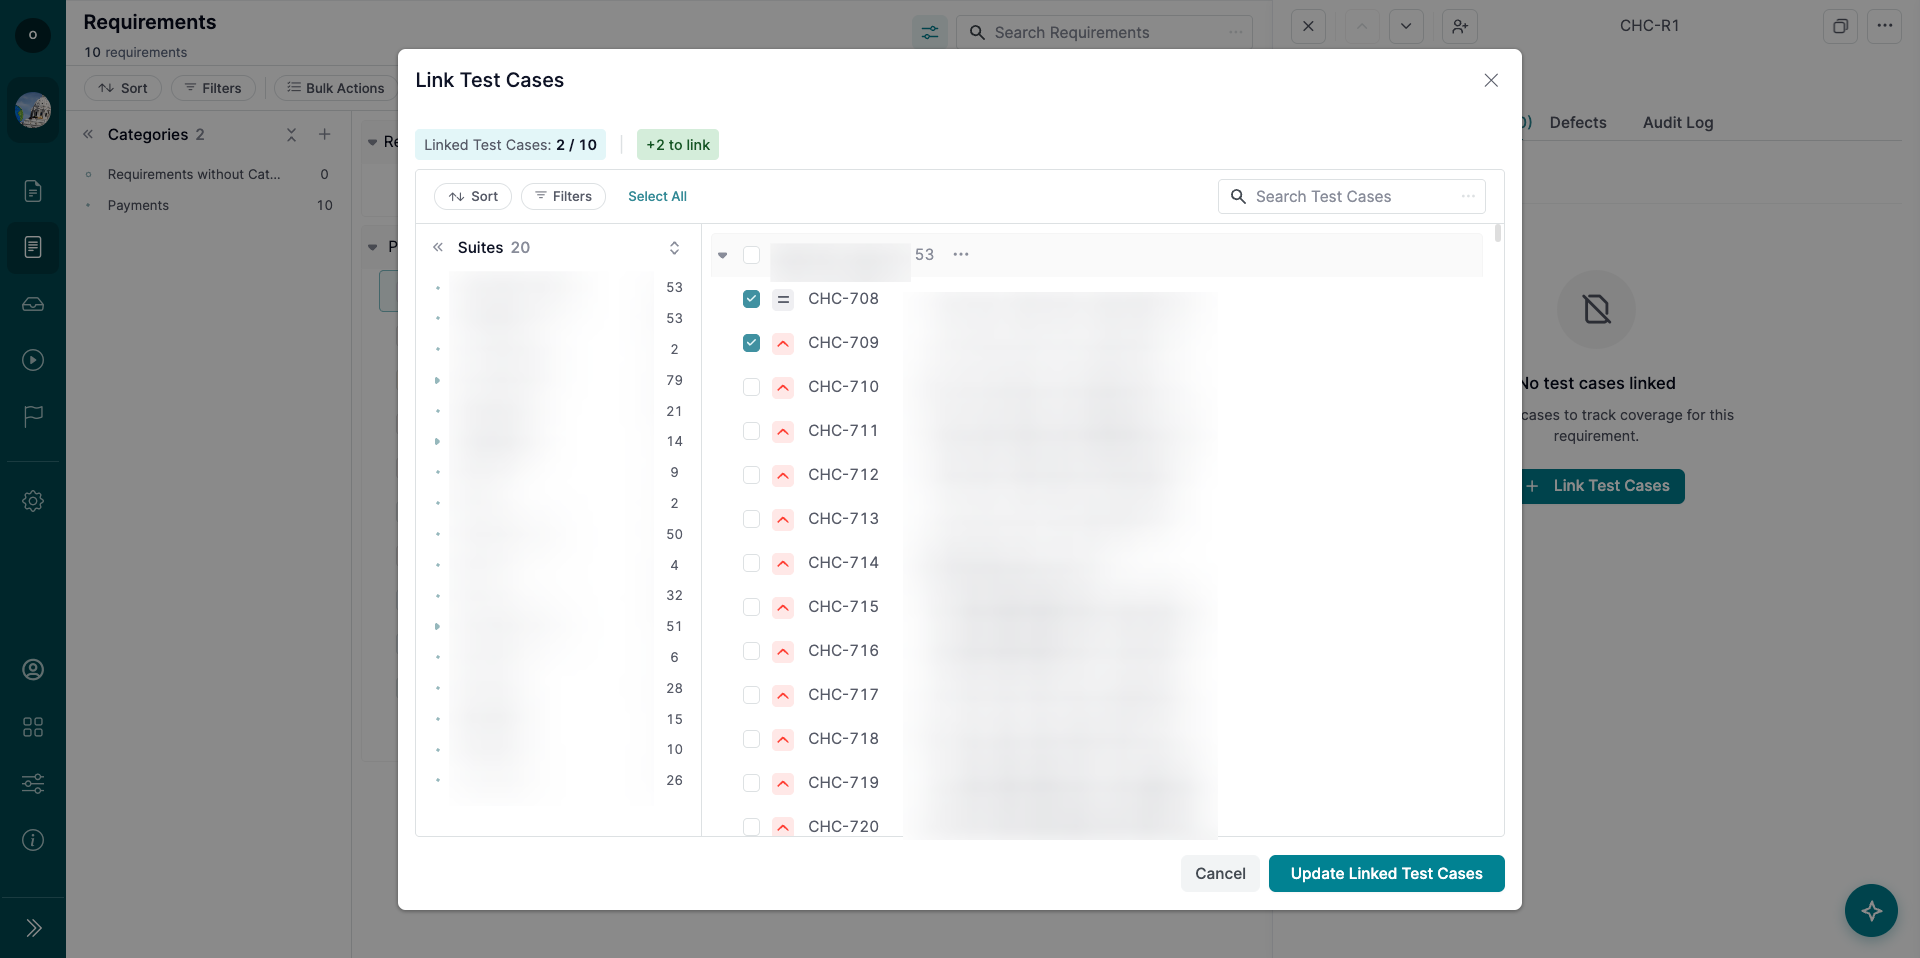
4. Create Test Cases from Requirements

You can generate Test Cases from existing Requirements.

To do this:

  • Ask the AI Assistant to create Test Cases from one or more Requirements.
  • Specify which Requirement or group of Requirements should be used.
  • Add any extra testing focus if needed, such as edge cases, negative scenarios, or regression coverage.
  • Review the generated Test Cases.
  • Confirm creation.

The generated Test Cases will be based on the selected Requirements.

Note: This helps keep test coverage connected to product scope.

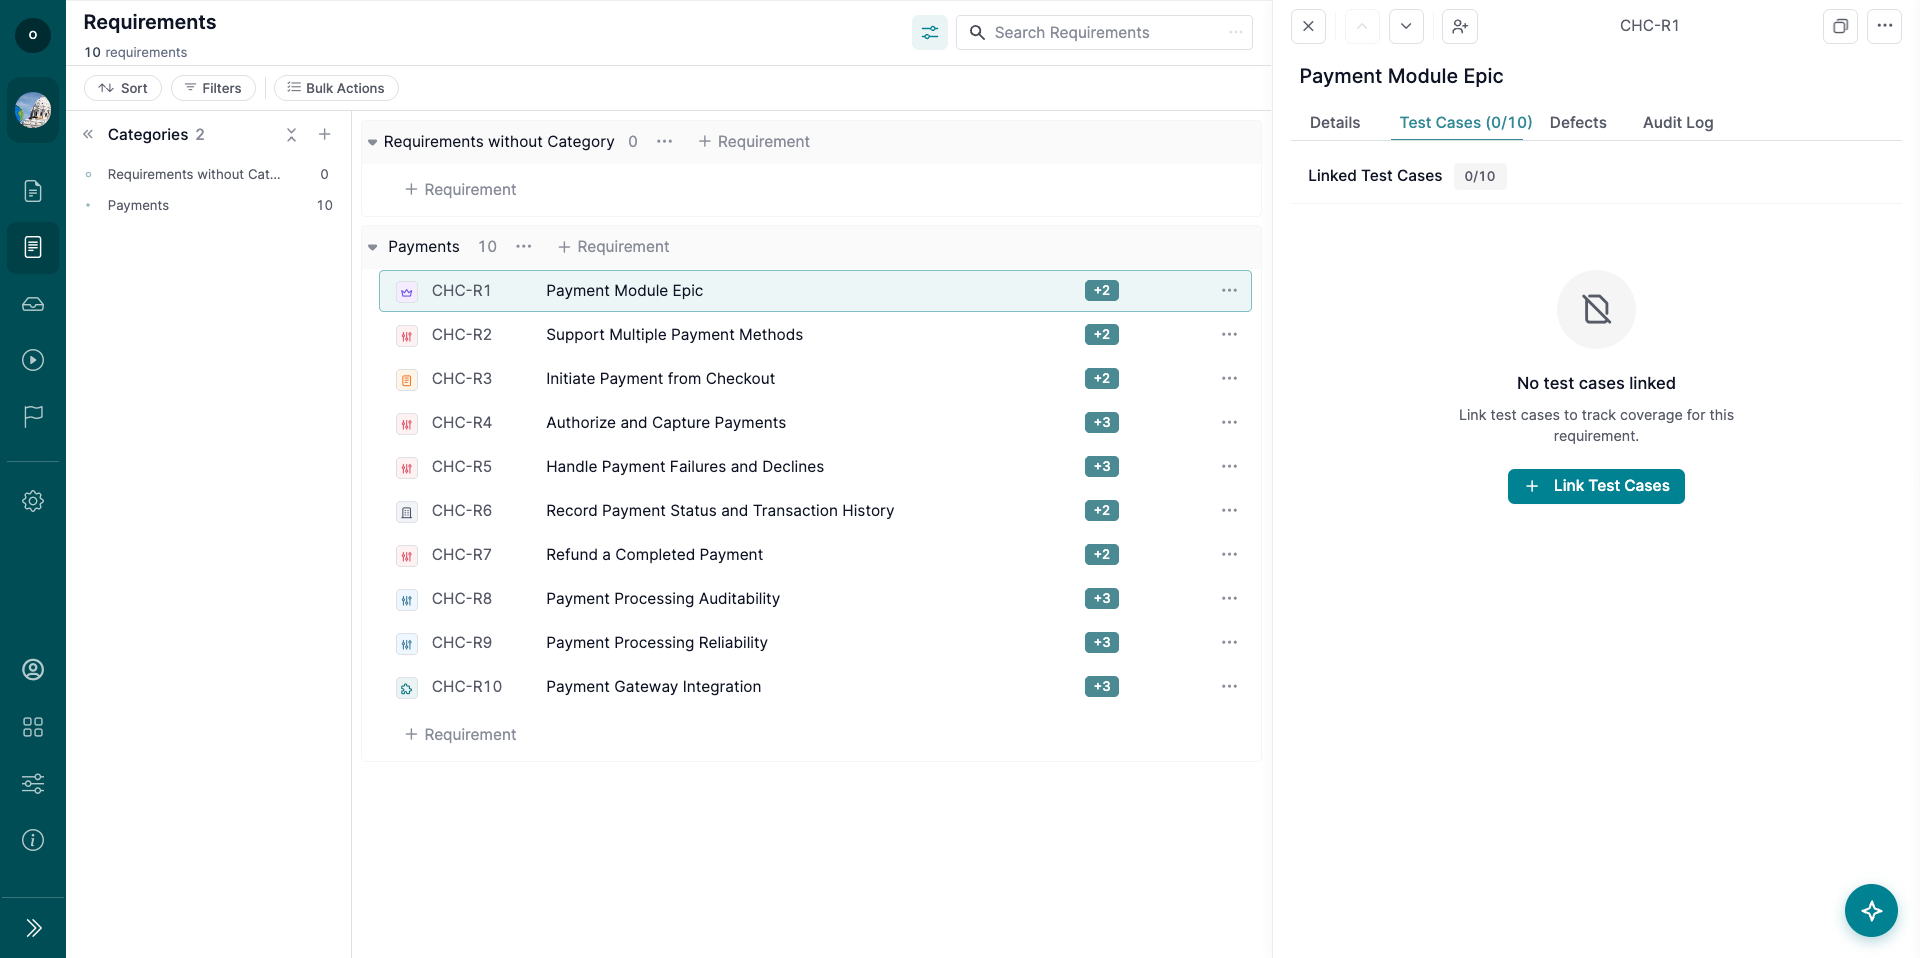
5. Ask Questions About Test Cases

You can ask the AI Assistant for information about existing Test Cases.

For example, you can ask it to:

  • Find Test Cases related to a feature.
  • Summarize Test Cases for a specific area.
  • Identify Test Cases with specific tags, types, or priorities.
  • Explain what a group of Test Cases covers.

The AI Assistant will return information based on the Test Cases available in the current project.

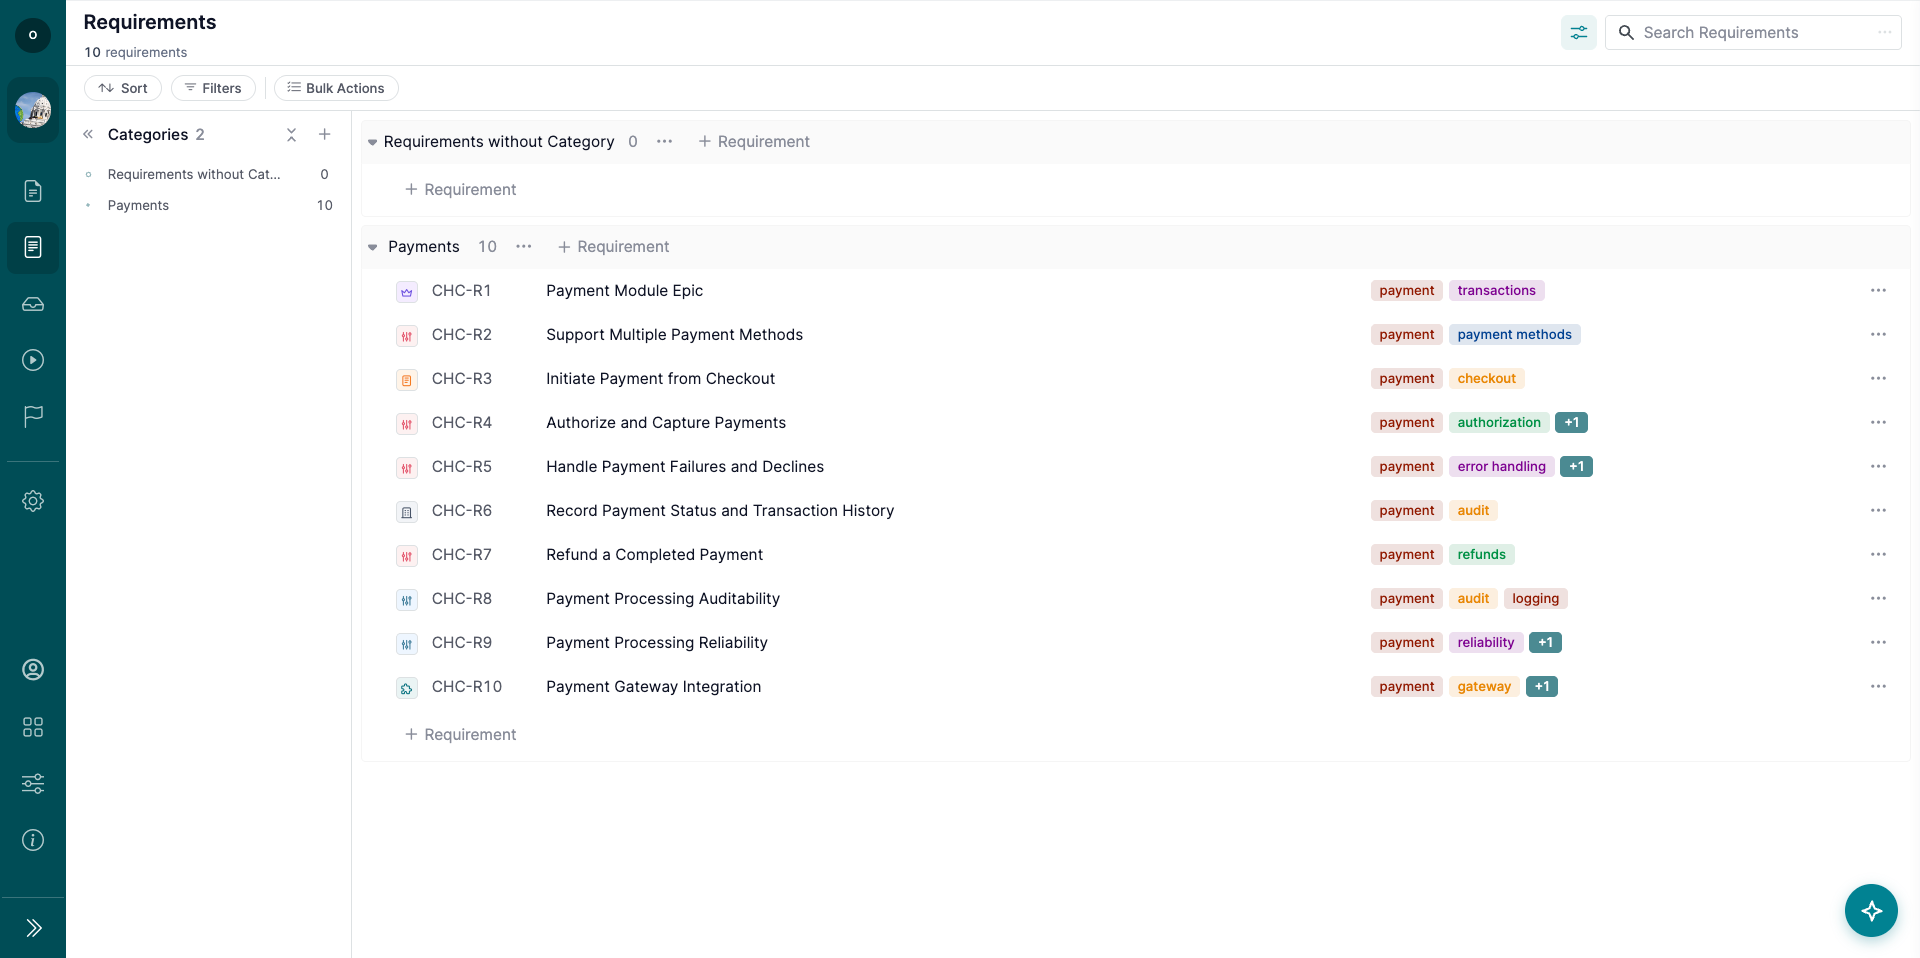
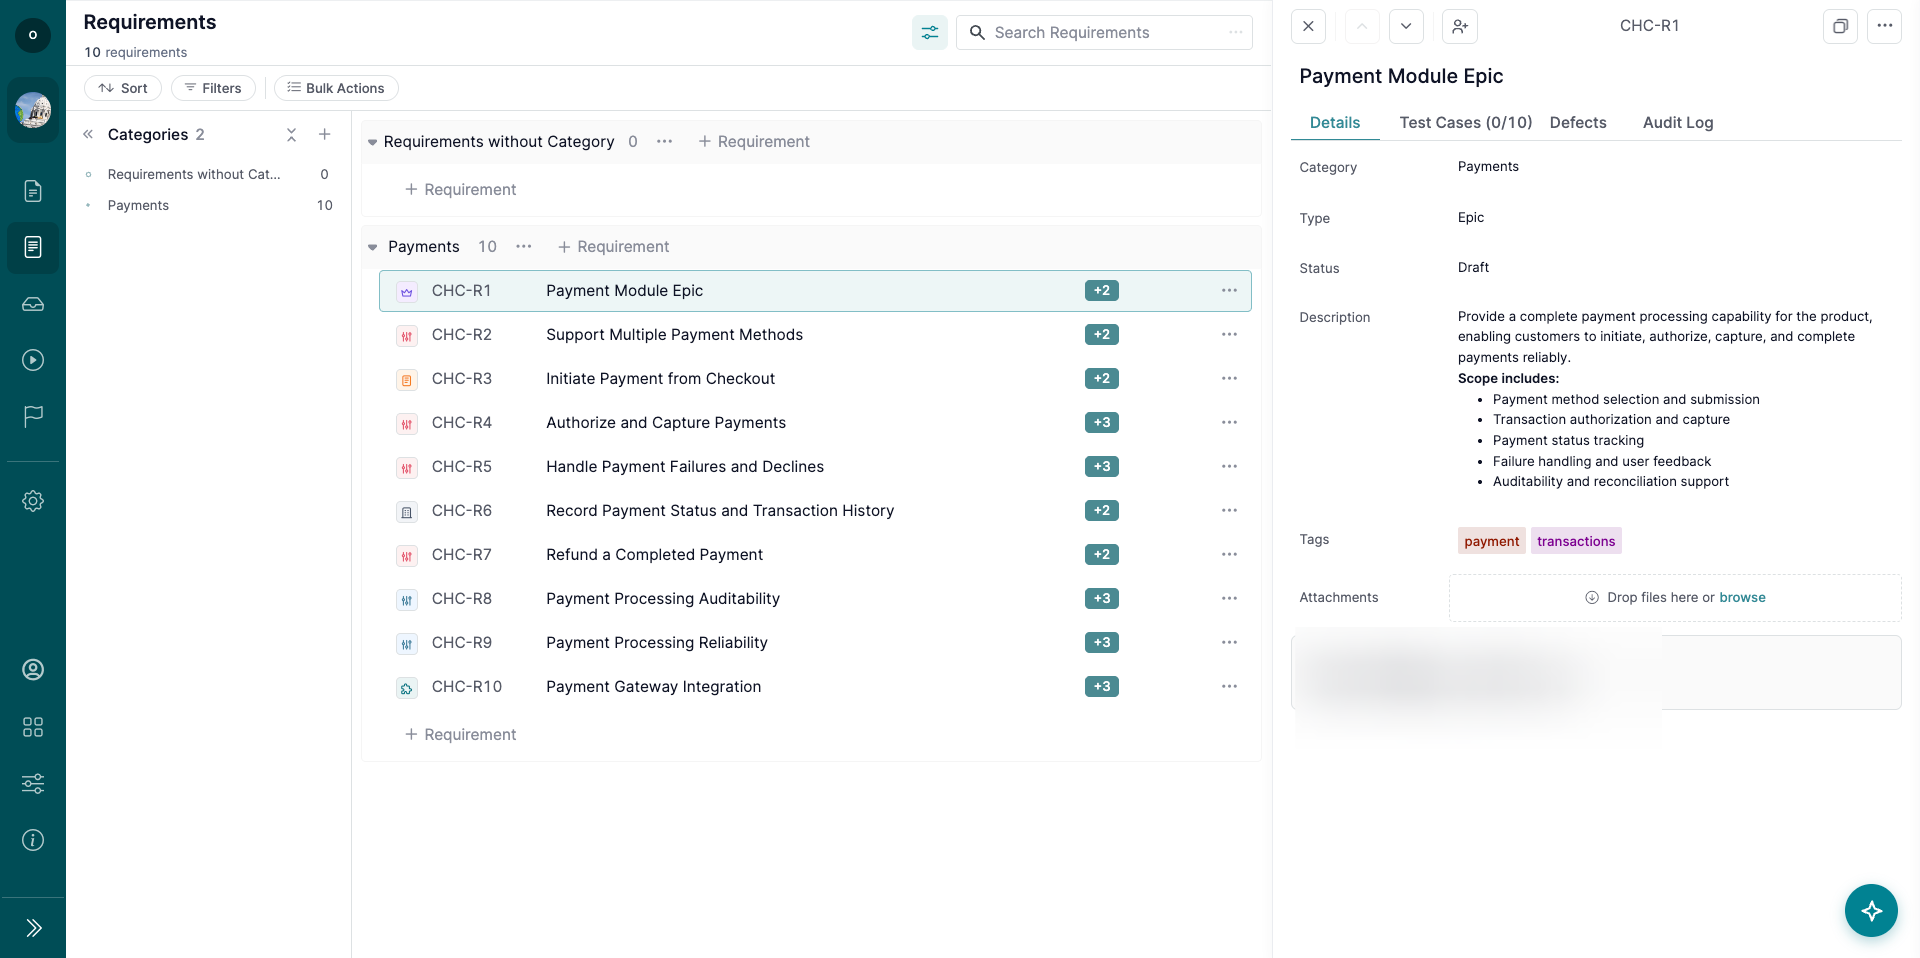
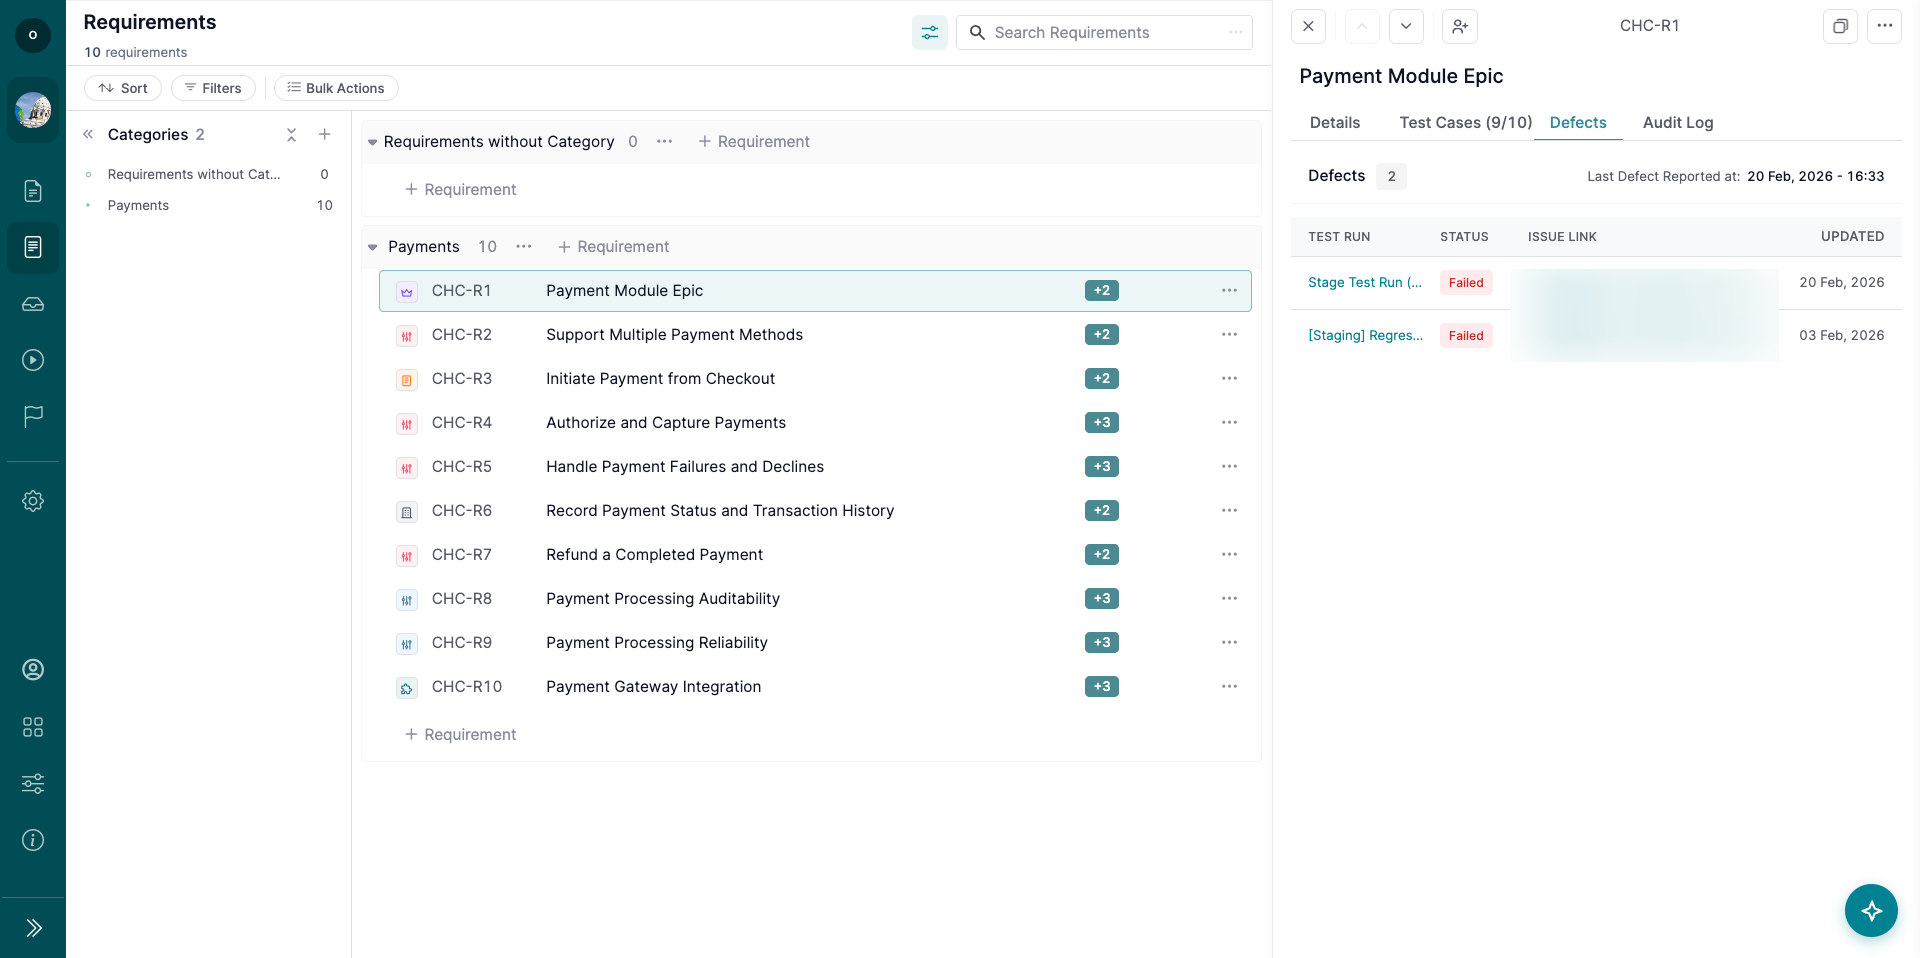
6. Ask Questions About Requirements

You can also ask the AI Assistant for information about Requirements.

For example, you can ask it to:

  • Find Requirements by title, status, type, or tag.
  • Summarize Requirements for a feature.
  • Identify Requirements without related Test Cases.
  • Explain what a Requirement covers.

Use this to quickly understand product scope and test coverage.

7. Review Before Saving

When the AI Assistant creates Test Cases or Requirements, review the generated content before confirming.

Check that:

  • Titles are clear.
  • Steps and expected results are accurate.
  • Requirements match the intended business logic.
  • Generated Test Cases cover the right scenarios.

Note: The AI Assistant helps speed up drafting, but final review stays with the user.

What’s Next?

Use the AI Assistant to draft Test Cases and Requirements faster, or to get quick information about existing project coverage. For additional help, check related guides or contact support—we’re here to help!

arrow right
Create & Manage Requirements - Build Traceability from Scope to Testing
icon calendar
July 1, 2026

The Requirements page helps your team define, organize, and track product requirements inside a project.

Requirements can be linked to Test Cases, giving your team clear traceability from product scope to test coverage, execution, and defects.

1. Open the Requirements Page

To work with requirements:

  • Open your project.
  • Go to the Requirements page.
  • Use the page to create requirements, organize them by category, and link them to Test Cases.

The Requirements page includes:

  • Categories tree
  • Requirements list
  • Requirement details panel
  • Search
  • Sorting
  • Filters
  • Bulk Actions

2. Create Requirement Categories

Categories help organize requirements into logical groups.

To create a category:

  • Go to the Categories section.
  • Click the ‘+’ button.
  • Enter the category title.
  • Save the category.

You can create nested categories up to 4 levels deep.

You can also:

  • Rename categories.
  • Create subcategories.
  • Rearrange categories with drag and drop.
  • Delete categories.

Note: Deleting a category does not delete the requirements inside it. Requirements are moved to the parent category or to ‘Requirements without Category’.

3. Create a Requirement

To create a requirement:

  • Select a category.
  • Click ‘+ Requirement.’
  • Enter the requirement title.
  • Click on the requirement to see Requirement Details.
  • In the Requirement Details set:
    • Requirement type
    • Requirement status
    • Add a description, tags, assignees, or attachments if needed.

Available requirement types include:

  • Epic
  • Feature
  • User Story
  • Use Case
  • Functional Requirement
  • Non-Functional Requirement
  • Business Requirement

Note: ‘User Story’ is the default requirement type.

4. Manage Requirement Details

Click a requirement row to open the Requirement Details panel.

From the details panel, you can view and update:

  • Title
  • Category
  • Type
  • Description
  • Status
  • Tags
  • Assignees
  • Attachments
  • Metadata

The details panel also includes tabs for:

  • Details
  • Test Cases
  • Defects
  • Audit Log

Note: Requirement descriptions support plain text and markdown.

5. Link Requirements to Test Cases

Use the Test Cases tab to link requirements with related Test Cases.

To link Test Cases:

  • Open a requirement.
  • Go to the Test Cases tab.
  • Search for Test Cases by title or key.
  • Select the Test Cases you want to link.

Linked Test Cases are synchronized both ways. If you link a Test Case from the requirement, the requirement also appears in the Test Case’s Related Requirements field.

Note: Up to 10 Test Cases can be linked to one requirement.

6. Track Defects from Linked Test Cases

The Defects tab shows defects connected to test results from linked Test Cases.

You can view:

  • Last tested date
  • Defect count
  • Test Run
  • Test Result status
  • External defect link
  • Timestamp

Use this tab to understand whether a requirement has known issues based on related test execution.

7. Use Requirement Filters and Search

Use filters to narrow down the Requirements list.

Available filters include:

  • Assignee
  • Category
  • Status
  • Type
  • Tags
  • Orphaned requirements

You can also search by:

  • Requirement title
  • Requirement key
  • Requirement details

Note: An orphaned requirement is a requirement that has no linked Test Cases.

8. Use Bulk Actions

Bulk Actions help update multiple requirements at once.

Available Bulk Actions include:

  • Edit
  • Duplicate
  • Delete
  • Assign
  • Status update

Bulk Actions follow the same behavior and confirmation patterns as Test Cases.

9. Import and Export Requirements

You can import requirements from CSV, including:

  • Categories
  • Requirement Title
  • Requirement Description
  • Status
  • Type
  • Tags

You can also export requirements to CSV.

10. View Requirement History

The Audit Log tab shows changes made to the requirement.

Tracked changes include:

  • Field updates
  • Status changes
  • Tag changes
  • Attachment changes
  • Test Case linking and unlinking
  • Requirement deletion and restoration

What’s Next?

Use Requirements to connect product scope with test coverage and execution results. For additional help, check related guides or contact support—we’re here to help!

arrow right

Organize Your Testing Process

Start using TestCaseLab now as your test case management system and bring your Quality Assurance at the top-level!
Get Started For Free
No Credit Card Required
Organize Your Testing Process